
[ad_1]
Dependency Injection is the idea of outsourcing the injection of an object’s dependencies to the Spring container.
Dependency injection generally known as DI is likely one of the most wonderful and common ideas supplied by the Spring framework. You may contemplate it as a design sample. Because the identify suggests, it’s associated to injecting dependencies or we will say helper objects.
The primary function of dependency injection is to present free coupling. For big-scale purposes, tightly coupled code can result in monumental effort throughout modification in an already created software.
Let’s see what the Dependency Injection idea says after which we are going to go deep into this idea however with straightforward and easy phrases to know it higher:
“The shopper delegates to name to a different object the accountability of offering its dependencies.”
What’s Dependency Injection (DI)?
It’s a sample that helps the Spring’s Inversion of Management(IOC) idea. IOC is an idea the place we outsource the minor or main management of our objects to an exterior container. So some a part of the item’s controls is transferred to an exterior entity that makes the code loosely coupled.
Dependency Injection is the method of outsourcing the injection of an object’s dependencies into an object to the exterior container. This manner object itself is not going to be chargeable for injecting the dependencies.
In Spring, the dependency injection is dealt with by the Spring container a.okay.a ApplicationContext.
Let’s see how the code with out DI idea seems like:
Suppose, we’ve got an object of a category Worker. This Worker class has an occasion for Tackle class. A easy instance of Worker has-a Tackle. Within the beneath instance, we’ve got an Worker class, an Tackle interface, and implementation of Tackle interface- CurrentAddress.
public class Worker {

    non-public Tackle deal with;

    public Worker() {
        deal with = new CurrentAddress();
    }
}
The Worker has an Tackle dependency. We’re instantiating Tackle within the Worker constructor and you’ll see code is tightly coupled. Suppose, sooner or later, we have to change the Tackle occasion then we have to change the code in our software. This dependency is hardcoded and it’s a nasty strategy.
Now look beneath to learn how code seems like after we are utilizing Spring’s Dependency Injection. Let’s contemplate the identical instance:
@Element
public class Worker {

    non-public Tackle deal with;

    @Autowired
    Worker(Tackle deal with) {
        this.deal with = deal with;
    }

}
See, we’re not exhausting coding the dependency in our class. As a substitute, the Spring container will inject our dependency. Within the above instance, we’re utilizing constructor injection, which we are going to cowl intimately within the beneath sections in addition to different injection varieties.
Dependency Injection Varieties in Spring
There are various methods by which we will implement dependency injection in Spring. Let’s see the overview of all dependency injection varieties and see what fits finest with our challenge.
Now one factor to notice right here is that after we are utilizing XML primarily based spring configuration then there are solely two dependency injection varieties:
- Constructor Injection
- Setter Injection
However with the annotation primarily based spring configuration, we’ve got extra choices to select from:
- Constructor Injection
- Setter Injection
- Subject Injection
- Methodology Injection
Within the beneath sections, we are going to dig deeper into these DI varieties. First, let’s see what can we injecting utilizing the Spring DI characteristic.
What can we inject by utilizing Dependency Injection in Spring?
Spring has only a few limitations if any. It’s a really wonderful and common framework. So it offers flexibility to inject any kind of dependency into our objects.
Here’s a fast listing to know what kind of dependencies could be injected by utilizing spring dependency injection:
- Dependency objects
- Primitive varieties
- String literals
- Collections
So virtually every part, proper?. Let’s dig deeper into the spring dependency injection and inject dependencies into our object(s) with some sensible examples.
First, let’s arrange our challenge in order that we will get some hands-on follow in Spring DI.
Spring Mission Setup (XML configuration)
We’re going to use Eclipse IDE for this instance. If you happen to favor some other IDE, that’s nice too. There shall be very minor modifications if any within the challenge setup on completely different IDEs. So let’s get began:
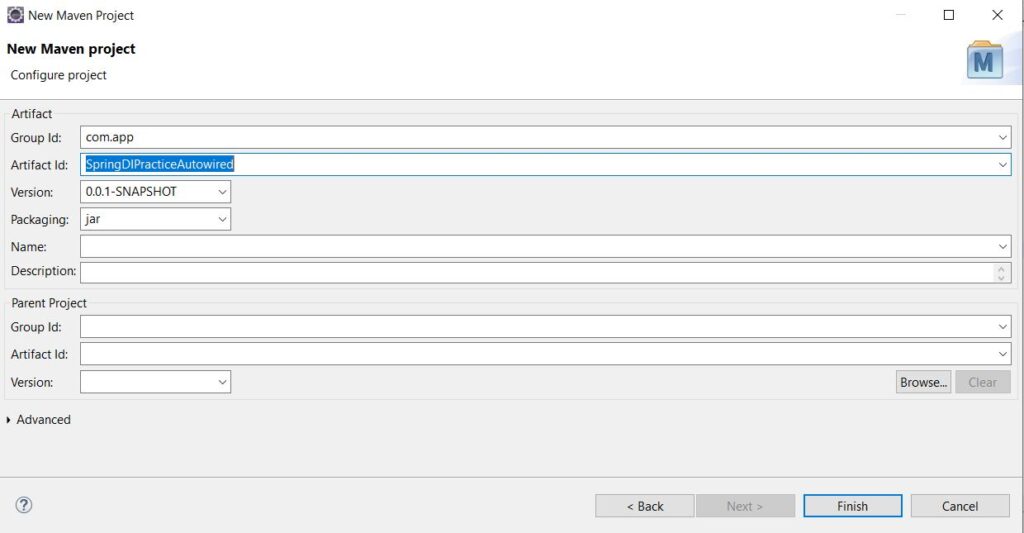
We are going to create a Maven challenge. Go to eclipse IDE and Click on on New >> Maven challenge.

Now choose “Create a Easy challenge (skip archetype choice)” and hit Subsequent then you can be offered with the beneath window. Right here, you possibly can add the group and artifact id in your challenge and hit End. Your maven challenge is created.

It’s time to do some spring work. Let’s add dependencies that shall be wanted to implement dependency injection in our challenge.
We are going to solely want spring-core and spring-context dependencies for now. As we all know, the DI characteristic is a part of spring-core dependency and we want spring-context to entry implementations of spring container – ApplicationContext.
<dependency>
    <groupId>org.springframework</groupId>
    <artifactId>spring-core</artifactId>
    <model>5.3.9</model>
</dependency>

<dependency>
    <groupId>org.springframework</groupId>
    <artifactId>spring-context</artifactId>
    <model>5.3.9</model>
</dependency>
To vary the java model, nevertheless not needed now, you possibly can add the beneath properties in your pom.xml of your challenge:
<properties>
    <maven.compiler.supply>1.8</maven.compiler.supply>
    <maven.compiler.goal>1.8</maven.compiler.goal>
</properties>
Now we are going to create an XML file that’ll be used for spring configurations. Let’s create an XML file and identify it applicationContext.xml. Nonetheless, you possibly can select any identify.
We’re including this file in our src/fundamental/java in order that it’s accessible by way of the classpath.
applicationContext.xml
<?xml model="1.0" encoding="UTF-8"?>

<beans xmlns="http://www.springframework.org/schema/beans"
	xmlns:context="http://www.springframework.org/schema/context"
	xmlns:xsi="http://www.w3.org/2001/XMLSchema-instance"
	xsi:schemaLocation="
        http://www.springframework.org/schema/beans
        http://www.springframework.org/schema/beans/spring-beans.xsd
        http://www.springframework.org/schema/context
        http://www.springframework.org/schema/context/spring-context.xsd">

</beans>
As you possibly can see, it solely has schema definitions as of now. It is a easy template of the spring configuration file. These schema definitions are wanted so as to add additional configuration.
Now, our constructing blocks are prepared. It’s time to now implement dependency injection so let’s create our worker and different needed lessons, interfaces, and so on.
Tackle.java
bundle com.app;

public interface Tackle {
    public String getAddress();
}
Now, present an implementation of the Tackle interface:
CurrentAddress.java
bundle com.app;

@Element
public class CurrentAddress implements Tackle {

    public String getAddress() {
        return "That is the present deal with";
    }
}
Discover that we’re including @Element annotation above class CurrentAddress in order that it’s thought-about a Spring bean by the spring framework and the spring container will create the bean for this class within the container itself. This is step one, in any other case, the spring container can not discover this bean, and injecting it into one other object is out of context.
Now let’s create our Worker class with Tackle as a dependency:
Worker.java
bundle com.app;

import org.springframework.stereotype.Element;

@Element
public class Worker {
    non-public Tackle deal with;
}
Now we’ve got our Worker class with Tackle in it. Now let’s see how will we use dependency injection by spring to supply the Tackle dependency to our Worker class.
We now have two methods with spring XML configuration to make use of dependency injection:
- Constructor Injection
- Setter Injection
We are going to show every within the beneath sections.
Constructor Injection
Through the use of the constructor of a category, we will inform the spring container to inject some dependency into our object. This manner of dependency injection is known as constructor injection.
Inject Objects
So now let’s change our Worker class so as to add a constructor that shall be utilized by the spring container to inject the Tackle dependency into it.
Worker.java
bundle com.app;

import org.springframework.stereotype.Element;

@Element
public class Worker {

    non-public Tackle deal with;

    public Worker(Tackle deal with) {
        this.deal with = deal with;
    }

}
You may see, it’s a easy constructor that takes the Tackle kind and assigns it to the Worker’s Tackle.
Now we have to add configuration within the spring configuration file to make this work.
First, we’ve got to register our Tackle bean in our spring configuration file. So registering the Tackle as a spring bean within the spring container could be achieved by the next code:
<bean id="deal with" class="com.app.CurrentAddress"></bean>Right here, id denotes the identify of the bean that’ll be used for uniquely figuring out the spring bean and sophistication denotes the category identify with the bundle.
Now, it’s time to register Worker as a spring bean within the configuration file equally as we outlined Tackle bean
<bean id="worker" class="com.app.Worker"></bean>Now, we have to inform the spring container that we wish dependencies of the Worker class to be injected by way of constructor injection, and right here’s how we do that:
<bean id="worker" class="com.app.Worker">
    <constructor-arg ref="deal with" />
</bean>
So we use the constructor-arg tag to inform the spring container that we wish the constructor for use for dependency injection and the attribute ref denotes the “id” of the bean that must be injected. In straightforward phrases, the worth in ref needs to be the identical as the worth of id for the bean that must be injected.
On this case, Because the id of the bean Tackle is deal with so we put “deal with” in ref.
So beneath is our up to date applicationContext.xml file.
applicationContext.xml
<?xml model="1.0" encoding="UTF-8"?>

<beans xmlns="http://www.springframework.org/schema/beans"
	xmlns:context="http://www.springframework.org/schema/context"
	xmlns:xsi="http://www.w3.org/2001/XMLSchema-instance"
	xsi:schemaLocation="
        http://www.springframework.org/schema/beans
        http://www.springframework.org/schema/beans/spring-beans.xsd
        http://www.springframework.org/schema/context
        http://www.springframework.org/schema/context/spring-context.xsd">


	<bean id="deal with" class="com.app.CurrentAddress"></bean>

	<!-- Dependency Injection by way of constructor injection -->
	<bean id="worker" class="com.app.Worker">
		<constructor-arg ref="deal with" />
	</bean>

</beans>
Now the ultimate step is to check our challenge. Let’s write our Fundamental class, the place we get these beans from the container and attempt to print out the deal with.
Fundamental.java
bundle com.app;

import org.springframework.context.assist.ClassPathXmlApplicationContext;

public class Fundamental {

    public static void fundamental(String[] args) {

        // Loading the Spring configuration file
        ClassPathXmlApplicationContext context = new
            ClassPathXmlApplicationContext("applicationContext.xml");

        // Retrieving the bean
        Worker worker = context.getBean("worker", Worker.class);

        // Calling strategies on the bean
        System.out.println(worker.getEmployeeAddress());

        // Closing the context
        context.shut();

    }
}
Let’s break our code line by line and perceive what we’re doing.
ClassPathXmlApplicationContext context =
    new ClassPathXmlApplicationContext("applicationContext.xml");
Right here we’re utilizing ClassPathXmlApplicationContext to create our spring container and we’re passing the identify of our spring configuration file in order that configurations are loaded into the container. ClassPathXmlApplicationContext is the implementation of ApplicationContext and it represents a Spring container.
Worker worker = context.getBean("worker", Worker.class);Right here, we’re retrieving our Worker bean from the spring container utilizing the getBean methodology. We’re passing the id of the bean and kind of the bean to the getBean methodology. This mainly will return the occasion of Worker class.
This code can be written as beneath, each performs the identical:
Worker worker = (Worker) context.getBean("worker");As a substitute of offering the kind of bean within the getBean methodology, we will explicitly typecast it.
Observe: If we neither present the kind of bean and nor typecast it, It would throw compile-time error stating: Kind mismatch: Can not convert from Object to Worker.
System.out.println(worker.getEmployeeAddress());Right here, we’re calling the getEmployeeAddress() methodology of the Worker class to print the deal with particulars.
Lastly, we’re closing the appliance context.
Let’s see the output of our program:

Inject String literal
Now we are going to have a look at how we will inject string literals into the objects utilizing constructor injection.
Suppose, in our above CurrentAddress class, we gained’t hardcode the deal with however we are going to inject the deal with values by way of dependency injection. So let’s change our CurrentAddress class.
CurrentAddress.java
bundle com.app;

import org.springframework.stereotype.Element;

@Element
public class CurrentAddress implements Tackle {


    non-public String metropolis;
    non-public String state;
    non-public String home;

    public CurrentAddress(String metropolis, String home, String state) {

       this.metropolis=metropolis;
       this.state=state;
       this.home=home;
    }

    public String getAddress() {
        return metropolis + ", " + state + ", " + home;

    }
}
So we’ve got added three String variables metropolis, state, and home. and we’re utilizing constructor injection to inject these values and at last, we’ve got a getAddress methodology that can concatenate all these variables and return the deal with as an entire.
Now, let’s see the place and how one can present values in these variables.
applicationContext.xml
<?xml model="1.0" encoding="UTF-8"?>

<beans xmlns="http://www.springframework.org/schema/beans"
	xmlns:context="http://www.springframework.org/schema/context"
	xmlns:xsi="http://www.w3.org/2001/XMLSchema-instance"
	xsi:schemaLocation="
        http://www.springframework.org/schema/beans
        http://www.springframework.org/schema/beans/spring-beans.xsd
        http://www.springframework.org/schema/context
        http://www.springframework.org/schema/context/spring-context.xsd">


	<bean id="deal with" class="com.app.CurrentAddress">
	    <constructor-arg identify="metropolis" worth="Noida" />
	    <constructor-arg identify="state" worth="U.P" />
	    <constructor-arg identify="home" worth="H1234" />
	</bean>

	<!-- Dependency Injection by way of constructor injection -->
	<bean id="worker" class="com.app.Worker">
		<constructor-arg ref="deal with" />
	</bean>

</beans>
See, beneath is the code to inject String literals into the objects utilizing dependency injection utilizing the constructor:
<constructor-arg identify="metropolis" worth="Noida" />Identical constructor-arg tag, with two attributes identify and worth. The identify denotes the variable identify and worth holds the worth that must be injected in that variable. So the town shall be set to Noida.
Discover that whereas injecting objects, we used the ref attribute, and for injecting literals we use to call and worth attributes.
Inject Primitives
Let’s change our CurrentAddress class as soon as extra and introduce an int variable that we are going to inject utilizing constructor injection.
So we’re including yet another variable int pincode.
CurrentAddress.java
bundle com.app;

import org.springframework.stereotype.Element;

@Element
public class CurrentAddress implements Tackle {


    non-public String metropolis;
    non-public String state;
    non-public String home;
    non-public int pincode;

    public CurrentAddress(String metropolis, String home, String state, int pincode) {

       this.metropolis=metropolis;
       this.state=state;
       this.home=home;
       this.pincode=pincode;
    }

    public String getAddress() {
        return metropolis + ", " + state + ", " + home+", "+pincode;

    }
}
Just like the String literal injection. Simply want some change in applicationContext.xml for injecting integer or some other primitive worth.
We are able to use the kind attribute to specify the kind of the worth that we need to be injected. if we wish int to be injected, we will present kind as int. for double, we will present kind as double, and so forth.
<constructor-arg identify="pincode" worth="1234" kind="int"/>One factor to notice right here is that offering identify and kind attributes isn’t needed so long as we offer worth in the identical order as it’s handed within the constructor.
That means, if we don’t present identify and kind attribute like beneath:
<?xml model="1.0" encoding="UTF-8"?>

<beans xmlns="http://www.springframework.org/schema/beans"
	xmlns:context="http://www.springframework.org/schema/context"
	xmlns:xsi="http://www.w3.org/2001/XMLSchema-instance"
	xsi:schemaLocation="
        http://www.springframework.org/schema/beans
        http://www.springframework.org/schema/beans/spring-beans.xsd
        http://www.springframework.org/schema/context
        http://www.springframework.org/schema/context/spring-context.xsd">


	<bean id="deal with" class="com.app.CurrentAddress">
	 <constructor-arg worth="Noida" />
	 <constructor-arg  worth="U.P" />
	 <constructor-arg  worth="H1234" />
	 <constructor-arg  worth="1234" />

	</bean>

	<!-- Dependency Injection by way of constructor injection -->
	<bean id="worker" class="com.app.Worker">
		<constructor-arg ref="deal with" />
	</bean>

</beans>
Values shall be injected in the identical order. The primary parameter of the constructor will change into Noida, second U.P, and so forth.
Inject Collections
We are able to additionally use constructor injection to inject java collections into the objects. Suppose, we need to inject Listing into an object. we will do it with dependency injection.
Inject Listing of String
Let’s modify our Worker class to simply accept a Listing.
Let’s add an occasion variable to carry the listing of property for the worker:
non-public Listing<String> property;Now, create a technique that can return the String illustration of this listing:
public String getEmployeeAssets() {
    return property.toString();
}
We additionally want so as to add the parameter Listing<String> property within the constructor.
Up to date Worker.java
bundle com.app;

import java.util.Listing;

import org.springframework.stereotype.Element;

@Element
public class Worker {

    non-public Tackle deal with;
    non-public Listing<String> property;

    public Worker(Tackle deal with, Listing<String> property) {
        this.deal with = deal with;
        this.property=property;
    }

    public String getEmployeeAddress() {
        return this.deal with.getAddress();
    }

    public String getEmployeeAssets() {
        return property.toString();
    }
}
To inject a listing of values within the object utilizing dependency injection, we will use the <listing> tag in our constructor-arg tag within the applicationContext.xml file.
Like this:
<constructor-arg>
    <listing>
        <worth>Laptop computer</worth>
		<worth>Headphones</worth>
		<worth>ID card</worth>
	</listing>
</constructor-arg>
That is our up to date applicationContext.xml:
<?xml model="1.0" encoding="UTF-8"?>

<beans xmlns="http://www.springframework.org/schema/beans"
	xmlns:context="http://www.springframework.org/schema/context"
	xmlns:xsi="http://www.w3.org/2001/XMLSchema-instance"
	xsi:schemaLocation="
        http://www.springframework.org/schema/beans
        http://www.springframework.org/schema/beans/spring-beans.xsd
        http://www.springframework.org/schema/context
        http://www.springframework.org/schema/context/spring-context.xsd">


	<bean id="deal with" class="com.app.CurrentAddress">
		<constructor-arg identify="metropolis" worth="Noida" />
		<constructor-arg identify="state" worth="U.P" />
		<constructor-arg identify="home" worth="H1234" />
		<constructor-arg identify="pincode" worth="1234"
			kind="int" />
	</bean>

	<bean id="worker" class="com.app.Worker">
		<constructor-arg ref="deal with" />
		<constructor-arg>
			<listing>
				<worth>Laptop computer</worth>
				<worth>Headphones</worth>
				<worth>ID card</worth>
			</listing>
		</constructor-arg>
	</bean>

</beans>
Let’s take a look at the change by including beneath line our Fundamental class:
System.out.println(worker.getEmployeeAssets());Fundamental.java
bundle com.app;

import org.springframework.context.assist.ClassPathXmlApplicationContext;

public class Fundamental {

    public static void fundamental(String[] args) {

        // Loading the Spring configuration file
        ClassPathXmlApplicationContext context = new ClassPathXmlApplicationContext("applicationContext.xml");

        // Retrieving the bean
        Worker worker = context.getBean("worker", Worker.class);

        // Calling strategies on the bean
        System.out.println(worker.getEmployeeAddress());

        System.out.println(worker.getEmployeeAssets());

        // Closing the context
        context.shut();

    }
}
Output:

Inject Listing of Objects
Now, there could also be a case, the place we wish our listing to carry objects as a substitute of literals. Let’s see one instance of how one can inject a listing of objects as a dependency into our objects.
Let’s outline a Listing<Tackle> into our Worker class and a technique to get the string illustration of this listing.
non-public Listing<Tackle> addresses;

public String getEmployeeListOfAddress() {
    return addresses.toString();
}
We additionally must override the toString methodology in CurrentAddress class as we’re calling the toString methodology on the listing of deal with that can internally name toString on CurrentAddress.
@Override
public String toString() {
    return "CurrentAddress [city=" + city + ", state=" + state + ", house=" + house + ",
        pincode=" + pincode + "]";
}
Worker.java
bundle com.app;

import java.util.Listing;

import org.springframework.stereotype.Element;

@Element
public class Worker {

    non-public Tackle deal with;
    non-public Listing<String> property;
    non-public Listing<Tackle> addresses;

    public Worker(Tackle deal with, Listing<String> property, Listing<Tackle> addresses) {
        this.deal with = deal with;
        this.property=property;
        this.addresses=addresses;
    }

    public String getEmployeeAddress() {
        return this.deal with.getAddress();
    }

    public String getEmployeeAssets() {
        return property.toString();
    }

    public String getEmployeeListOfAddress() {
        return addresses.toString();
    }
}
CurrentAddress.java
bundle com.app;

import org.springframework.stereotype.Element;

@Element
public class CurrentAddress implements Tackle {

    non-public String metropolis;
    non-public String state;
    non-public String home;
    non-public int pincode;

    public CurrentAddress(String metropolis, String home, String state, int pincode) {

        this.metropolis = metropolis;
        this.state = state;
        this.home = home;
        this.pincode = pincode;
    }

    public String getAddress() {
        return metropolis + ", " + state + ", " + home + ", " + pincode;

    }

    @Override
    public String toString() {
        return "CurrentAddress [city=" + city + ", state=" + state + ", house=" + house + ", pincode=" + pincode + "]";
    }

}
To inject a listing of objects, we will use the next code:
<constructor-arg>
    <listing>
        <ref bean="deal with" />
        <ref bean="address2" />
	</listing>
</constructor-arg>
Right here, the ref tag is used to indicate that we’re injecting the item’s listing. bean tag denotes the id of the bean that shall be inserted within the listing. So we have to have two spring beans with id deal with and address2 respectively in our applicationContext.xml file.
applicationContext.xml
<?xml model="1.0" encoding="UTF-8"?>

<beans xmlns="http://www.springframework.org/schema/beans"
	xmlns:context="http://www.springframework.org/schema/context"
	xmlns:xsi="http://www.w3.org/2001/XMLSchema-instance"
	xsi:schemaLocation="
        http://www.springframework.org/schema/beans
        http://www.springframework.org/schema/beans/spring-beans.xsd
        http://www.springframework.org/schema/context
        http://www.springframework.org/schema/context/spring-context.xsd">


	<bean id="deal with" class="com.app.CurrentAddress">
		<constructor-arg identify="metropolis" worth="Noida" />
		<constructor-arg identify="state" worth="U.P" />
		<constructor-arg identify="home" worth="H1234" />
		<constructor-arg identify="pincode" worth="1234"
			kind="int" />
	</bean>

	<bean id="address2" class="com.app.CurrentAddress">
		<constructor-arg identify="metropolis" worth="Kanpur" />
		<constructor-arg identify="state" worth="U.P" />
		<constructor-arg identify="home" worth="H9056" />
		<constructor-arg identify="pincode" worth="2345"
			kind="int" />
	</bean>

	<bean id="worker" class="com.app.Worker">
		<constructor-arg ref="deal with" />
		<constructor-arg>
			<listing>
				<worth>Laptop computer</worth>
				<worth>Headphones</worth>
				<worth>ID card</worth>
			</listing>
		</constructor-arg>
		<constructor-arg>
			<listing>
				<ref bean="deal with" />
				<ref bean="address2" />
			</listing>
		</constructor-arg>
	</bean>

</beans>
We are able to take a look at this in our Fundamental class.
Fundamental.java
bundle com.app;

import org.springframework.context.assist.ClassPathXmlApplicationContext;

public class Fundamental {

    public static void fundamental(String[] args) {

        // Loading the Spring configuration file
        ClassPathXmlApplicationContext context = new ClassPathXmlApplicationContext("applicationContext.xml");

        // Retrieving the bean
        Worker worker = context.getBean("worker", Worker.class);

        // Calling strategies on the bean
        System.out.println(worker.getEmployeeAddress());

        System.out.println(worker.getEmployeeAssets());

        System.out.println(worker.getEmployeeListOfAddress());

        // Closing the context
        context.shut();

    }
}
Output:

Inject Map of String
Let’s outline a map of String, String in our Worker class. Add the map parameter within the constructor and at last create a technique to return the string illustration of the map.
non-public Map<String, String> performanceScore;

public Worker(Tackle deal with, Listing<String> property, Listing<Tackle> addresses, Map<String, String> performanceScore) {
        this.deal with = deal with;
        this.property = property;
        this.addresses = addresses;
        this.performanceScore = performanceScore;
}
Worker.java
bundle com.app;

import java.util.Listing;
import java.util.Map;

import org.springframework.stereotype.Element;

@Element
public class Worker {

    non-public Tackle deal with;
    non-public Listing<String> property;
    non-public Listing<Tackle> addresses;
    non-public Map<String, String> performanceScore;

    public Worker(Tackle deal with, Listing<String> property, Listing<Tackle> addresses, Map<String, String> performanceScore) {
        this.deal with = deal with;
        this.property = property;
        this.addresses = addresses;
        this.performanceScore = performanceScore;
    }

    public String getEmployeeAddress() {
        return this.deal with.getAddress();
    }

    public String getEmployeeAssets() {
        return property.toString();
    }

    public String getEmployeeListOfAddress() {
        return addresses.toString();
    }

    public String getPerformanceScore() {
        return performanceScore.toString();
    }
}
Now, to outline the map in our constructor-arg, we will add the beneath code in our applicationContext.xml file:
<constructor-arg>
    <map>
       <entry key="Technical" worth="Above Expectation"></entry>
	   <entry key="Management" worth="Common"></entry>
	   <entry key="Communication" worth="Met Expectation"></entry>
	</map>
</constructor-arg>
applicationContext.xml
<?xml model="1.0" encoding="UTF-8"?>

<beans xmlns="http://www.springframework.org/schema/beans"
	xmlns:context="http://www.springframework.org/schema/context"
	xmlns:xsi="http://www.w3.org/2001/XMLSchema-instance"
	xsi:schemaLocation="
        http://www.springframework.org/schema/beans
        http://www.springframework.org/schema/beans/spring-beans.xsd
        http://www.springframework.org/schema/context
        http://www.springframework.org/schema/context/spring-context.xsd">


	<bean id="deal with" class="com.app.CurrentAddress">
		<constructor-arg identify="metropolis" worth="Noida" />
		<constructor-arg identify="state" worth="U.P" />
		<constructor-arg identify="home" worth="H1234" />
		<constructor-arg identify="pincode" worth="1234"
			kind="int" />
	</bean>

	<bean id="address2" class="com.app.CurrentAddress">
		<constructor-arg identify="metropolis" worth="Kanpur" />
		<constructor-arg identify="state" worth="U.P" />
		<constructor-arg identify="home" worth="H9056" />
		<constructor-arg identify="pincode" worth="2345"
			kind="int" />
	</bean>

	<bean id="worker" class="com.app.Worker">
		<constructor-arg ref="deal with" />
		<constructor-arg>
			<listing>
				<worth>Laptop computer</worth>
				<worth>Headphones</worth>
				<worth>ID card</worth>
			</listing>
		</constructor-arg>
		<constructor-arg>
			<listing>
				<ref bean="deal with" />
				<ref bean="address2" />
			</listing>
		</constructor-arg>
		<constructor-arg>
			<map>
				<entry key="Technical" worth="Above Expectation"></entry>
				<entry key="Management" worth="Common"></entry>
				<entry key="Communication" worth="Met Expectation"></entry>
			</map>
		</constructor-arg>
	</bean>

</beans>
Now we will take a look at it by including the beneath line in our Fundamental.java file:
System.out.println(worker.getPerformanceScore());Output:

Setter Injection
Setter Injection because the identify suggests makes use of a setter for dependency injection. Each setup of code is just like constructor injection however now we are going to use setter strategies as a substitute of the constructor.
So we are going to take up the identical instance to show it.
Inject Objects
Let’s add yet another class to our instance to demonstarte use of setter injection to inject dependency objects. We are going to introduce yet another class Division and sophistication Worker may have its dependency. Let’s create our Division class.
Division.java
bundle com.app;

public class Division {

    non-public String identify;

    public Division(String identify) {
        this.identify = identify;
    }

    public String getName() {
        return this.identify;
    }
}
Let’s add Division dependency in our current Worker class. We have to declare the Division after which we are going to create a setter methodology that’ll be utilized by the spring container to inject Division dependency.
non-public Division division;

public void setDepartment(Division division) {
    this.division = division;
}
The ultimate step is so as to add configuration in applicationContext.xml to make use of setter injection for Division injection in Worker. Bear in mind, we additionally must delare Division bean first whereas offering identify depenedncy.
<bean id="division" class="com.app.Division">
		<constructor-arg worth="IT division" />
</bean>

<bean id="worker" class="com.app.Worker">
		<property identify="division" ref="division" />
</bean>
You may see we’ve got use <property> tag for setter injection. We use identify and ref attributes inside this tag. identify attribute refers back to the setter methodology which shall be used for injection. Let me clarify:
If in case you have put identify=”division” , spring will capitalize this worth and append set on this to search out setter methodology identify so it is going to change into setDepartment so spring will discover setDepartment methodology after which will inject the item supplied in ref attribute.
As we already know ref refers back to the bean id of the category.
Inject String literals
Let’s change our CurrentAddress class to carry yet another String variable landmark and create a setter methodology for dependency injection. We is not going to add landmark within the constructor, as we’re not utilizing constructor injection for this particular worth. Additionally, we’re including landmark in our getAddress methodology and toString methodology.
non-public String landmark;

public void setLandmark(String landmark) {
    this.landmark = landmark;
}

public String getAddress() {
   return metropolis + ", " + state + ", " + home + ", " + pincode +", "+landmark;
}

@Override
public String toString() {
    return "CurrentAddress [city=" + city + ", state=" + state + ", house=" + house + ",
        pincode=" + pincode + ", landmark=" + landmark + "]";
}
Now, let’s add some modifications in our spring configuration file to permit dependency injection of String landmark.
<bean id="deal with" class="com.app.CurrentAddress">
    <property identify="landmark" worth="STAR HOTEL" />
</bean>

<bean id="address2" class="com.app.CurrentAddress">
    <property identify="landmark" worth="GREEN PARK" />
</bean>
We have used <property> tag, it’s used for setter injection. As we learnt earlier, identify attribute helps spring to search out the setter methodology and worth offers the string literal to be injected.
Inject Primitives
Injecting primitives and injecting String literrals is strictly similar. So we should use similar <property> tag with identify and worth attributes.
The code will look one thing like this:
<property identify="employeeId" worth="1"/>Spring Mission Setup (annotation primarily based)
Let’s create a brand new challenge for dependency injection with annotations. Spring configuration could be very verbose and prolonged so utilizing spring annotations all the time helps.
Let’s create a brand new challenge utilizing maven. Go to eclipse IDE and Click on on New >> Maven challenge.
Now we have to choose “Create a Easy challenge (skip archetype choice)” and press Subsequent after which add the group id and artifact id in your challenge and pressFinish. Your maven challenge is created.
Let’s add some dependencies which might be wanted to implement dependency injection in our challenge:
<dependency>
    <groupId>org.springframework</groupId>
    <artifactId>spring-core</artifactId>
    <model>5.3.9</model>
</dependency>

<dependency>
    <groupId>org.springframework</groupId>
    <artifactId>spring-context</artifactId>
    <model>5.3.9</model>
</dependency>
Now, we are going to create our spring configuration file named as applicationContext.xml. First, it ought to have all of the schema definitions for spring.
<?xml model="1.0" encoding="UTF-8"?>

<beans xmlns="http://www.springframework.org/schema/beans"
	xmlns:context="http://www.springframework.org/schema/context"
	xmlns:xsi="http://www.w3.org/2001/XMLSchema-instance"
	xsi:schemaLocation="
        http://www.springframework.org/schema/beans
        http://www.springframework.org/schema/beans/spring-beans.xsd
        http://www.springframework.org/schema/context
        http://www.springframework.org/schema/context/spring-context.xsd">

</beans>
Now, as that we are going to use annotations for creating beans and for dependency injection so we don’t must create beans on this file. As a substitute, we’ll use annotations to outline our bean.
The one factor that we want in our spring configuration file is that we should always inform spring the bottom bundle the place spring can discover the beans.
We are able to present base bundle within the applicationContext.xml recordsdata like beneath:
<context:component-scan base-package="com.app" />So spring will search for all of the lessons annotated with @Element within the com.app bundle and all its subpackages and can register that class’s bean robotically.
applicationContext.xml
<?xml model="1.0" encoding="UTF-8"?>

<beans xmlns="http://www.springframework.org/schema/beans"
	xmlns:context="http://www.springframework.org/schema/context"
	xmlns:xsi="http://www.w3.org/2001/XMLSchema-instance"
	xsi:schemaLocation="
        http://www.springframework.org/schema/beans http://www.springframework.org/schema/beans/spring-beans.xsd http://www.springframework.org/schema/context http://www.springframework.org/schema/context/spring-context.xsd">

	<context:component-scan
		base-package="com.app" />

</beans>
Now, we simply want our lessons to be annotated with @Element and spring will robotically register that bean. So let’s create our lessons.
Worker.java
bundle com.app;

@Element
public class Worker {
    non-public Tackle deal with;
}
Tackle.java
bundle com.app;

public interface Tackle {
   public String getAddress();
}
CurrentAddress.java
bundle com.app;

@Element
public class CurrentAddress implements Tackle {

   public String getAddress() {
       return "That is the present deal with of worker";
   }

}
@Autowired annotation
@Autowired annotation reduces so many line of configuration from the spring configuration file. We are able to use @Autowired annotation for dependency injection in Spring. @Autowired annotation mainly wires up the dependencies robotically with the beans.
Spring discover out and appears for the category that mathes the kind of the bean to be injected after which inject it robotically.
You’ll be taught extra clearly with examples defined in beneath sections.
As Spring robotically wires up the dependencies with the bean it’s referred to as @Autowired or autowiring.
Dependency Injection with @Autowired annotation
Now let’s write some code to know dependency injection with autowiring extra clearly. We are going to use the lessons that we simply created on above part of spring configuration with annotation primarily based.
So let’s get began:
Constructor Injection with @Autowired
Because the identify of this part explains,we’re gonna use constructir injection to see how @Autowired annotation can be utilized on constructor for dependency injection.
So we are going to begin altering our Worker class first. First let’s create our worker class constructor:
    public Worker(Tackle deal with) {
        this.deal with = deal with;
    }
Now, what we want is simply an annotation above this constructor and all different work shall be dealt with by spring robotically.
@Autowired
public Worker(Tackle deal with) {
    this.deal with = deal with;
}
Now what spring will do, spring will robotically discover a bean by kind, that means a bean of Tackle kind and can inject it.
In our case, it’s currentAddess class, so it is going to inject this within the Worker bean.
Worker.java
bundle com.app;

import org.springframework.beans.manufacturing facility.annotation.Autowired;
import org.springframework.stereotype.Element;

@Element
public class Worker {

    non-public Tackle deal with;

    @Autowired
    public Worker(Tackle deal with) {
        this.deal with = deal with;
    }

    public String getEmployeeAddress() {
        return this.deal with.getAddress();
    }
}
Let’s write our Fundamental class to check it out:
Fundamental.java
bundle com.app;

import org.springframework.context.assist.ClassPathXmlApplicationContext;

public class Fundamental {

    public static void fundamental(String[] args) {

        // Loading the Spring configuration file
        ClassPathXmlApplicationContext context = new ClassPathXmlApplicationContext("applicationContext.xml");

        // Retrieving the bean
        Worker worker = context.getBean("worker", Worker.class);

        // Calling strategies on the bean
        System.out.println(worker.getEmployeeAddress());

        // Closing the context
        context.shut();

    }
}
Output:

See, a lot lesser code gave us very same outcomes. Due to autowiring and @Autowired annotation!
Setter Injection with @Autowired
As a substitute of constructor, we will additionally use setters for dependency injection utilizing autowiring.
All the things else stay similar, however the Worker class will now have a setter as a substitute of a constructor. Let’s have a look.
Worker.java
bundle com.app;

import org.springframework.beans.manufacturing facility.annotation.Autowired;
import org.springframework.stereotype.Element;

@Element
public class Worker {

    non-public Tackle deal with;

    /*    @Autowired
    public Worker(Tackle deal with) {
        this.deal with = deal with;
    }*/

    @Autowired
    public void setAddress(Tackle deal with) {
        this.deal with = deal with;
    }

    public String getEmployeeAddress() {
        return this.deal with.getAddress();
    }
}
The outcome will stay similar. Spring will robotically discover Tackle kind bean to inject as a dependency in our Worker class.
Methodology Injection with @Autowired
Just like the setter injection, we will use any methodology with @Autowired annotation and outcome stays precisely similar.
Worker.java
bundle com.app;

import org.springframework.beans.manufacturing facility.annotation.Autowired;
import org.springframework.stereotype.Element;

@Element
public class Worker {

    non-public Tackle deal with;

    // Constructor injection
    /*    @Autowired
    public Worker(Tackle deal with) {
        this.deal with = deal with;
    }*/

    // Setter injection
    /*  @Autowired
    public void setAddress(Tackle deal with) {
        this.deal with = deal with;
    }*/

    // Methodology injection
    @Autowired
    public void anyRandomMethod(Tackle deal with) {
        this.deal with = deal with;
    }

    public String getEmployeeAddress() {
        return this.deal with.getAddress();
    }
}
Subject Injection with @Autowired
My Private favourite is that this one. It doesn’t require constructor, any methodology, or any setter for dependency injection.
Subject injection simply requires one line of code. We put @Autowired annotation above the sector and it really works surprise. It would discover the bean by kind and inject the dependency robotically.
Let’s have a look:
Worker.java
bundle com.app;

import org.springframework.beans.manufacturing facility.annotation.Autowired;
import org.springframework.stereotype.Element;

@Element
public class Worker {

    @Autowired
    non-public Tackle deal with;

    // Constructor injection
    /*    @Autowired
    public Worker(Tackle deal with) {
        this.deal with = deal with;
    }*/

    // Setter injection
    /*  @Autowired
    public void setAddress(Tackle deal with) {
        this.deal with = deal with;
    }*/

    // Methodology injection
    /* @Autowired
    public void anyRandomMethod(Tackle deal with) {
        this.deal with = deal with;
    }*/

    public String getEmployeeAddress() {
        return this.deal with.getAddress();
    }
}
The best way to Inject Values from Properties file?
We now have seen a number of methods and varieties of dependency injection with spring. However we regularly use properties file in spring and there’s a must inject these values into our lessons. Doing so is extraordinarily straightforward in Spring framework.
What we want is: First load the properties file into our spring configuration file after which we consult with the property maintained within the properties file.
To load the properties file into our spring comfiguration file, we have to add beneath code in our applicationContext.xml file.
Right here my.properties is our identify of properties file.
<context:property-placeholder location="classpath:my.properties"/>Let’s outline our my.properties file:
my.identify=ashishNow if we’re utilizing xml primarily based dependency injection, we will add beneath code inside our bean tag the place we need to inject it.
<property identify="identify" worth="${my.identify}"/>${} refers back to the properties file’s property.
If we’re utilizing annotation, then we will merely declare the worth in our class like beneath:
@Worth("${my.identify}")
non-public String identify;
Conclusion
We now have discovered varied methods of dependency injection in Spring. Additionally a number of kind of dependency injection and we additionally labored on sensible examples. The supply code for each xml primarily based and annotation primarily based configuration is linked right here.
If in case you have any questions, let me know. Thanks for studying!
[ad_2]
Source_link