[ad_1]
In our earlier Python tutorial, we now have defined the right way to Create REST API in Python. On this tutorial, we are going to clarify the right way to develop your first internet software in Python.
In Python, there are various frameworks corresponding to Django, Flask which permits to simply create internet pages and develop internet functions.
On this tutorial, we are going to use Flask to develop our first internet software in Python. The Flask is a well-liked micro internet framework written in Python that gives helpful instruments and options to simply develop internet functions. It’s a simple to make use of and offers flexibility to new builders.
The Flask frameworks makes use of the Jinja2 template engine by default. You may clearly use a special template engine however you continue to have to put in Jinja2 to run Flask itself.
On this tutorial, we are going to develop an online software {that a} person kind with enter discipline and a undergo submit kind and dispay kind submitted values.

So let’s proceed with growing internet functions in Python.
Create Software Direcotry
First we are going to create our software listing. We are going to transfer to the Python set up listing to create software direcotry. Now we are going to create software direcotry web-app-python utilizing beneath command.
$ mkdir web-app-python
We are going to transfer to the newly create software listing.
$ mkdir web-app-python
Set up Flask
Now we are going to set up Flask framework to make use of it to develop our internet software with HTML kind.
$ pip set up Flask
Creating Webpage with Flask
After configuring undertaking and putting in required packages, let’s get our palms on the code.
Now we are going to create a Python script app.py and use Flask module.
In beneath script, we are going to import flask module at high of script. The Flask constructor takes the identify of present module (__name__) as argument. The route() operate of the Flask class is a decorator, which tells the appliance which URL ought to name the related operate.
The run() technique of Flask class runs the appliance on the native growth server.
#app.py

from flask import Flask
app = Flask(__name__)
@app.route('/')
def good day():
    return 'Hi there, My software with Flask in Python!'
if __name__=='__main__':
   app.run()
Once we run above script, it should show particulars like beneath on command line:
 * Serving Flask app 'app' (lazy loading)
 * Surroundings: manufacturing
   WARNING: It is a growth server. Don't use it in a manufacturing deployment.
   Use a manufacturing WSGI server as an alternative.
 * Debug mode: off
 * Operating on http://127.0.0.1:5000 (Press CTRL+C to stop)
Then goint to the url (http://127.0.0.1:5000) given above will seeing our first webpage displaying message there in your native server browser.
Creating Net Software utilizing with Flask
The above software solely shows a easy message with none HTML. Now we are going to create HTML Kind web page with enter ingredient utilizing HTML template file.
The Flask supplies a render_template() helper operate that enables using the Jinja templates. This can make managing HTML a lot simpler by writing your HTML code in .html recordsdata in addition to utilizing logic in your HTML code.
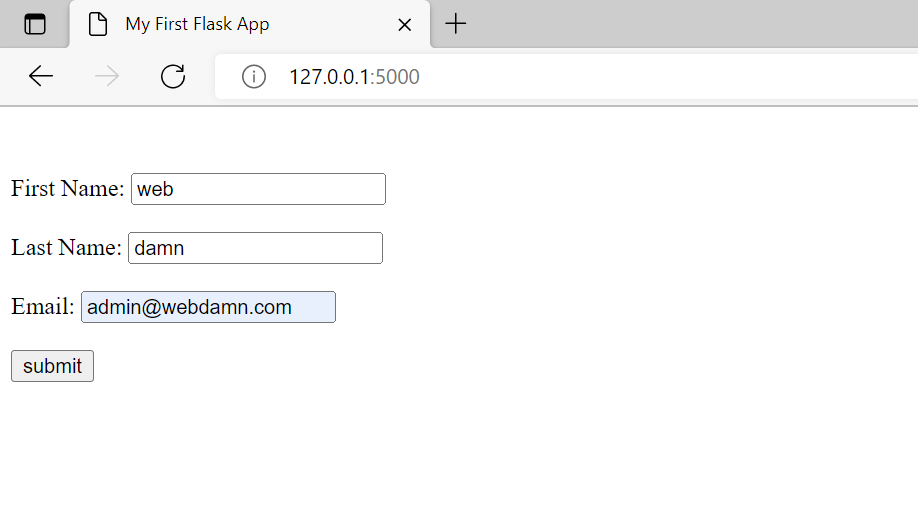
So now we are going to create a listing templates in our undertaking. Then we are going to create index.html with following HTML to create HTML Kind with enter.
<!DOCTYPE html>
<html lang="en">
<head>
<meta charset="UTF-8">
<meta http-equiv="X-UA-Appropriate" content material="IE=edge">
<meta identify="viewport" content material="width=<<for>>, initial-scale=1.0">
<title>My First Flask App</title>
</head>
<physique>
{% block content material %}
<br><br>
<kind motion="{{ url_for("index")}}" technique="put up">
<label for="firstName">First Title:</label>
<enter sort="textual content" id="firstName" identify="firstName" placeholder="First Title"><br><br>
<label for="lastName">Final Title:</label>
<enter sort="textual content" id="lastName" identify="lastName" placeholder="Final Title"><br><br>
<label for="lastName">Electronic mail:</label>
<enter sort="e-mail" id="e-mail" identify="e-mail" placeholder="Electronic mail"><br><br>
<button class="submit"> submit</button>
{% endblock %}
</physique>
</html>
Now save above file as index.html and render this utilizing Python script to create the server.
#app.py
from flask import Flask, request, render_template
app = Flask(__name__)
@app.route('/', strategies =["GET", "POST"])
def index():
if request.technique == "POST":
firstName = request.kind.get("firstName")
lastName = request.kind.get("lastName")
e-mail = request.kind.get("e-mail")
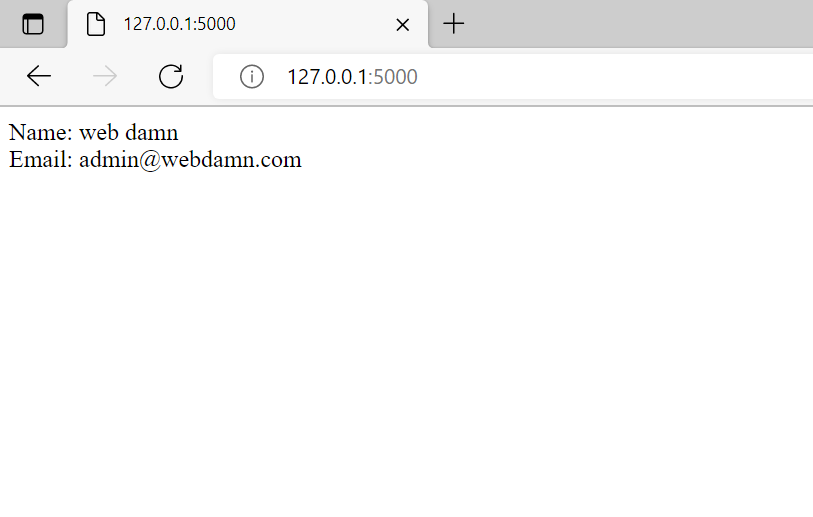
return "Title: " + firstName + " " + lastName + " <br>Electronic mail: "+e-mail
return render_template("index.html")
if __name__=='__main__':
app.run()
After working above script, the net server begins laoding webpages in browser utilizing url: http://127.0.0.1:5000/ and show following hTML kind with enter and submit button.
The beneath web page will show submit web page consequence when above kind submitted:
[ad_2]
Source_link