
[ad_1]
We’re going to begin a brand new sequence of tutorials about SceneKit, the framework that lets you construct and manipulate 3D objects in a 3D scene. SceneKit was launched for the primary time in macOS 10.8 (Mountain Lion) and successively in iOS 8. Just lately, SceneKit was added to watchOS 3.0 and tvOS 9.
SceneKit permits builders to create 3D video games and add 3D content material to apps utilizing high-level scene descriptions. Due to the latest introduction of ARKit, SceneKit is immediately a really related framework. If you wish to construct Augmented Actuality utility, you must be taught SceneKit. The framework offers a attain set of APIs that make straightforward so as to add animations, physics simulation, particle results, and lifelike bodily based mostly rendering.
We’re going to discover the fundamentals of SceneKit, first. In future posts, I’ll present you extra refined methods, writing customized shaders and mixing SceneKit with Metallic.
Nodes and Scene Graph
SceneKit is predicated of the idea of nodes. Every 3D object you wish to render utilizing SceneKit is a node, an object of sort SCNNode. An SCNNode object by itself has no seen content material when the scene containing is rendered on display screen. An SCNNode is simply a mannequin object offering the coordinate area rework (place, orientation, and scale) relative to its guardian node.
To construct a SceneKit 3D scene, you utilize a hierarchy of nodes to create its construction, then you definitely add lights, cameras, and geometry to every node to create the seen content material. SceneKit implements content material as a hierarchical tree construction of nodes, also called scene graph. It’s possible you’ll create a node hierarchy programmatically or load one from a file created utilizing 3D authoring instruments, or mix the 2 approaches.
The rootNode object in a scene defines the coordinate system of the rendered 3D world. Every little one node you add to this root node has its personal coordinate system, which is in flip inherited by its personal youngsters. That is very equally to the view hierarchy in UIKit.
SceneKit shows scenes in a SCNView, processing the scene graph and performing animations earlier than effectively rendering every body on the GPU.
Earlier than working with SceneKit, you need to be accustomed to primary graphics ideas reminiscent of coordinate methods and the arithmetic of three-dimensional geometry. SceneKit makes use of a right-handed coordinate system the place (by default) the route of view is alongside the unfavorable z-axis, as illustrated beneath.

You add 2D and 3D objects to a scene by attaching SCNGeometry objects to nodes. Geometries, in flip, have connected SCNMaterial objects that decide their look. To shade the geometries in a scene with gentle and shadow results, add nodes with connected SCNLight objects. To manage the perspective from which the scene seems when rendered, add nodes with connected SCNCamera objects. We’re going to have a look at all these courses on this publish.
Making a node
To create a node you utilize the init(geometry:) to initialize an object with a particular geometry (see later, Geometry). You may as well initialize a node utilizing a Mannequin I/O object utilizing the init(mdlObject:) technique. Mannequin I/O is a relative new Cocoa framework that gives a system-level understanding of 3D mannequin property and associated sources. Mannequin I/O was launched in iOS 9.
One other strategy to create a node is to make use of the SceneKit node editor accessible in Xcode. The editor seems when you choose a SceneKit file. Then, you drag nodes from the article library and assign a reputation to them.
Managing node’s transformations
As soon as the node is created, you’ll be able to assign it a place, eulerAngles and scale to rework the node.
The node’s place locates it throughout the coordinate system of its guardian, as modified by the node’s pivot property. The default place is the zero vector, indicating that the node is positioned on the origin of the guardian node’s coordinate system.
The node’s eulerAngles signify the node’s orientation, expressed as pitch, yaw, and roll angles, every in radians. The order of elements on this vector matches the axes of rotation:
- Pitch (the x element) is the rotation concerning the node’s x-axis.
- Yaw (the y element) is the rotation concerning the node’s y-axis.
- Roll (the z element) is the rotation concerning the node’s z-axis.
SceneKit applies these rotations relative to the node’s pivot property within the reverse order of the elements: first roll, then yaw, then pitch.
The node’s scale represents the dimensions issue utilized to the node. Every element of the dimensions vector multiplies the corresponding dimension of the node’s geometry. The default scale is 1.0 in all three dimensions.
The node’s pivot is much like the anchorPoint of a CALayer in Core Animation. The default pivot is SCNMatrix4Identity, specifying that the node’s place locates the origin of its coordinate system, its rotation is about an axis by means of its heart, and its scale can also be relative to that heart level.
The node’s orientation is expressed as a quaternion (SCNQuaternion). The rotation, eulerAngles, and orientation properties all have an effect on the rotational facet of the node’s rework property. Any change to one in every of these properties is mirrored within the others.
The rework property of a node is a 4×4 matrix of sort SCNMatrix4. This property combines the node’s rotation, place, and scale properties. The default transformation is SCNMatrix4Identity. While you set the worth of this property, the node’s rotation, orientation, eulerAngles, place, and scale properties mechanically change to match the brand new rework, and vice versa. SceneKit can carry out this conversion provided that the rework you present is a mix of rotation, translation, and scale operations. In the event you set the worth of this property to a skew transformation or to a nonaffine transformation, the values of those properties change into undefined.
In iOS 11, the SCNNode class duplicates all of the above properties and makes use of SIMD sorts to simplify the interoperability between Metallic and SceneKit. For instance, now you can set the place of a node utilizing the outdated place property and the brand new simdPosition. In the identical approach, now you can use simdEulerAngles, simdScale, simdOrientation, simdTransform and simdPivot instead of eulerAngles, scale, orientation, rework and pivot.
Managing node’s attributes
A node has extra properties you’ll be able to set:
– title is a String you ca use as distinctive identifier for a node
– gentle is a SCNLight object you’ll be able to connect to the node to signify a light-weight
– digital camera is a SCNCamera object representing a standpoint
– geometry is a SCNGeometry object representing the form of the node
– morpher is a SCNMorpher object accountable of mixing node’s geometry
– skinner is a SCNSkinner object answerable for skeletal animations of a node
– categoryBitMask is an Int that defines which class the node belongs to. You may assign every node of a scene to a number of classes.
Modifying the node visibility
You may modify the visibility of a node utilizing the next properties:
– isHidden is a boolean that determines the visibility of the node
– opacity is a CGFloat representing the opacity worth of a node
– renderingOrder is an Int representing the order the node’s content material is drawn respect to different nodes. Default worth is zero.
– castsShadow is a boolean that determines whether or not SceneKit renders the node’s contents into shadow maps
– movabilityHint controls how the node contributes to numerous motion-related results throughout rendering. The default worth is mounted. This worth is merely a touch that communicates to SceneKit’s rendering system about the way you wish to transfer content material in your scene; it doesn’t have an effect on your means to alter the node’s place or add animations or physics to the node.
Managing the node hierarchy
To examine the scene graph, you should use the guardian property to ask for the guardian node. The rootNode of a scene doesn’t have a guardian. Moreover, you should use the childNodes property to retrieve the array of kid nodes for the present node.
The strategies addChild(_:) and insert_:at:) let you add a brand new node to a different node. The tactic removeFromParentNode() removes a node from the scene graph. Lastly, replaceChildNode(_:with:) removes a baby from the node’s array of kids and inserts one other node as an alternative.
Looking out the node hierarchy
If you wish to search a particular node within the scene graph, you should use strategies reminiscent of childNode(withName:recursively:). This technique requires the title of the node you’re looking and a boolean worth. If the boolean worth is true, SceneKit search the whole node subtree, in any other case it searches solely the fast youngsters.
The childNodes(passingTest:) technique returns each node satisfying a offered check. For instance, you’ll be able to seek for empty nodes utilizing a block that returns true for nodes whose gentle, digital camera, and geometry properties are all nil.
enumerateChildNodes(_:) applies a closure to the kid node and descendant nodes. Lastly, enumerateHierarchy(_:) executes a specified closure for every of the node’s little one and descendant nodes, in addition to for the node itself.
Customizing node rendering
If you wish to customise the looks of a node, you may have totally different choices. This can be a very large subject that I’ll cowl in a future publish. Nevertheless, there may be additionally a less complicated answer based mostly on Core Picture. The filters property of a node is an array of CIFilters you’ll be able to assign to a node. The filters are then utilized to the rendered contents of the node. SceneKit renders the node (and its little one node hierarchy) into a picture buffer after which applies the filters earlier than compositing the filters’ output into the rendered scene. The order of the array determines the order of the Core Picture filter chain.
You may assign to the node a rendererDelegate object answerable for rendering customized contents for the node utilizing Metallic or OpenGL.
Working with positional audio
You may add an audio participant or a number of audio gamers to a node utilizing the addAudioPlayer(:_) technique or the audioPLayers property. You move an SCNAudioPlayer object to the node. This participant is initialized both utilizing an SCNAudioSource or a AVAudioNode. The audio participant is a controller for playback of a positional audio supply in a SceneKit scene.
You need to use the removeAudioPlayer(_:) and removeAllAudioPlayers()strategies to take away the audio participant from the node.
Copy a node
It generally mandatory to repeat a node. The clone() technique creates a duplicate of a node and its youngsters. For a non-recursive copy, use the copy() technique, which creates a duplicate of the node with none little one nodes. Remember that cloning or copying a node creates a reproduction of the node object, however not the geometries, lights, cameras, and different SceneKit objects connected to it—as a substitute, every copied node shares references to those objects.
In case you have node hierarchy, you should use the flattenedClone() technique and procure a brand new single node containing the mixed geometries and supplies of the node and its little one node subtree.
Changing between node coordinate area
If you wish to convert the place of a node from and to a different node, you should use convertPosition(_:from:) and convertPosition(_:to:) strategies. As an alternative the strategies convertTransform(_:from:) and convertTransform(_:to:) convert a change matrix from and to the node coordinate area outlined by one other node.
Scene View
SceneKit makes use of an SCNView to render a 3D scene. An SCNView is a subclass of UIView on iOS and tvOS or NSView on macOS. You create an SCNView utilizing Interface Builder or programmatically utilizing the init(body:choices:) technique. The second argument of the init(body:choices:) technique is a set of choices you’ll be able to move to the view to outline:
- The popular rendering API. This may be both Metallic, OpenGL ES 2.0, Open GL, Open GL 3.2 or Open GL 4.1. Please, test the documentation for the
SCNRenderingAPIenumeration for extra particulars. - The popular Metallic system. In the event you chosen Metallic because the rendering API, you can too choose the steel system (
MTLDevice) you wish to use. For instance, on a macOS system with a number of GPUs, you’ll be able to outline which GPU will likely be utilized by SceneKit. - In case your system has a number of GPUs, you’ll be able to set assign a boolean worth to the
preferLowPowerDevicechoice.
After making a SceneKit view, you assign a scene to it, utilizing the view scene property. The SCNView class offers totally different properties and strategies. For instance, you should use the allowsCameraControl property to find out whether or not the person can manipulate the present standpoint that’s used to render the scene. In the event you set this property to true, the person can modify the present standpoint with the mouse or trackpad in macOS or with multitouch gestures on iOS. This motion doesn’t modify digital camera objects already present within the scene graph or the nodes containing them. The default worth of this property is false.
If you must easy edges of a rendered scene, you’ll be able to change the sampling fee of the rendering utilizing the antialiasingMode property. This property will be set to the next values:
none(removes the multisampling)multisampling2Xmultisampling4Xmultisampling8Xmultisampling16X
Multisampling renders every pixel a number of instances and combines the outcomes, creating a better high quality picture at a efficiency value proportional to the variety of samples it makes use of.
The SCNView class additionally present the snapshot() technique to render the scene view in a picture (UIImage for iOS and NSImage for macOS). Discover that this technique is thread-safe and could also be referred to as at any time.
Construct a scene
Let’s see methods to construct a quite simple scene. Let’s create a brand new Xcode mission. I’m going to make use of Xcode 9 for this and subsequent examples. Title the mission SimpleScene. The very first thing we do is so as to add a scene view to the storyboard. Open the Most important.storyboard file and add a SceneKit view on high of the primary view of the view-controller. Add the format constraints to maintain the scene view full display screen. Now, go to the ViewController.swift and add import SceneKit beneath the import UIKit assertion. Let’s create an outlet for the scene view:
|
|
@IBOutlet var sceneView: SCNView! { willSet { newValue.allowsCameraControl = true } }
|
Join the outlet to the scene view.
Now, let’s create a scene. Within the finder of your mac, create a brand new folder. Rename the folder scene.scnassets. Drag and drop the folder within the Xcode mission. Create a brand new SceneKit file.
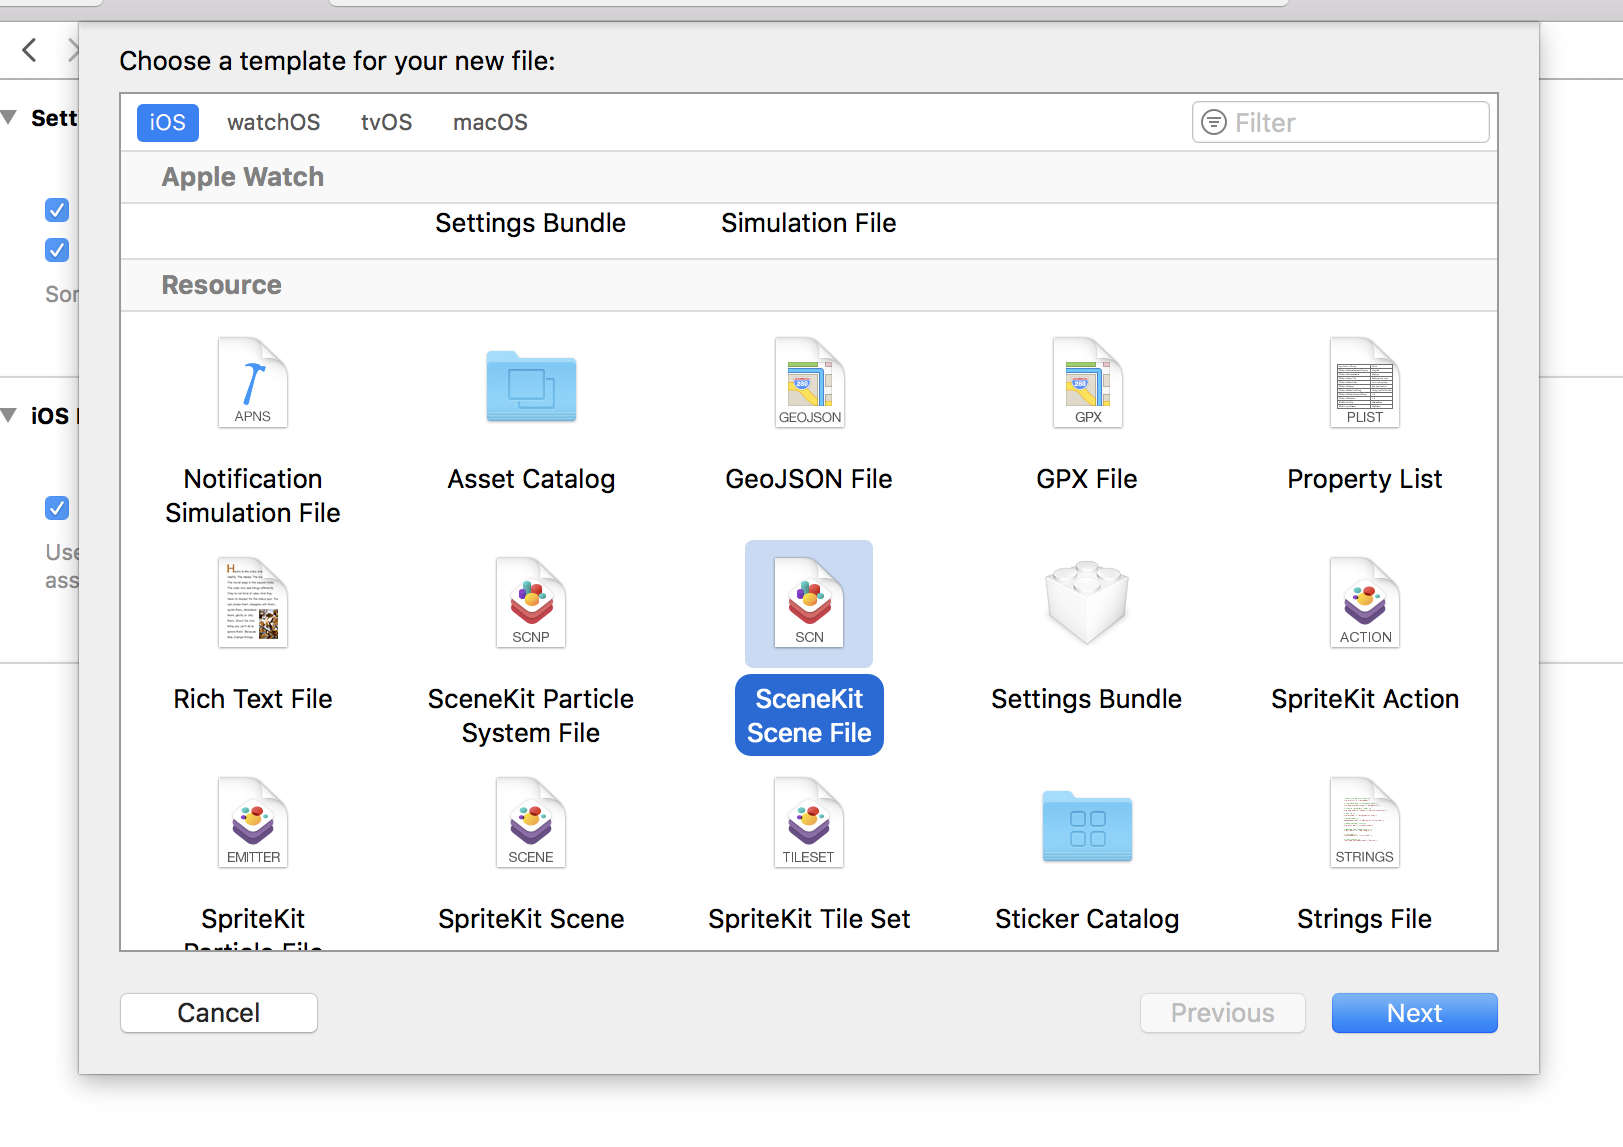
Title it scene.scn and closing drag it in to the not too long ago created folder. This folder improves the efficiency of loading this file at runtime. Within the viewDidLoad() technique, add the next traces of code:
|
|
guard let scene = SCNScene(named: “scene.scnassets/scene.scn”) else { print(“Not possible to load the scene”) return }
sceneView.scene = scene
|
Lastly, let’s add one thing to the scene. Open the scene.scn file. Drag and drop a sphere from the Object Library to the scene. In the event you click on on the small button on the underside left nook of the scene (see subsequent determine), you’ll unveil the Scene graph. In our Scene graph, we will see 2 nodes: digital camera and sphere.
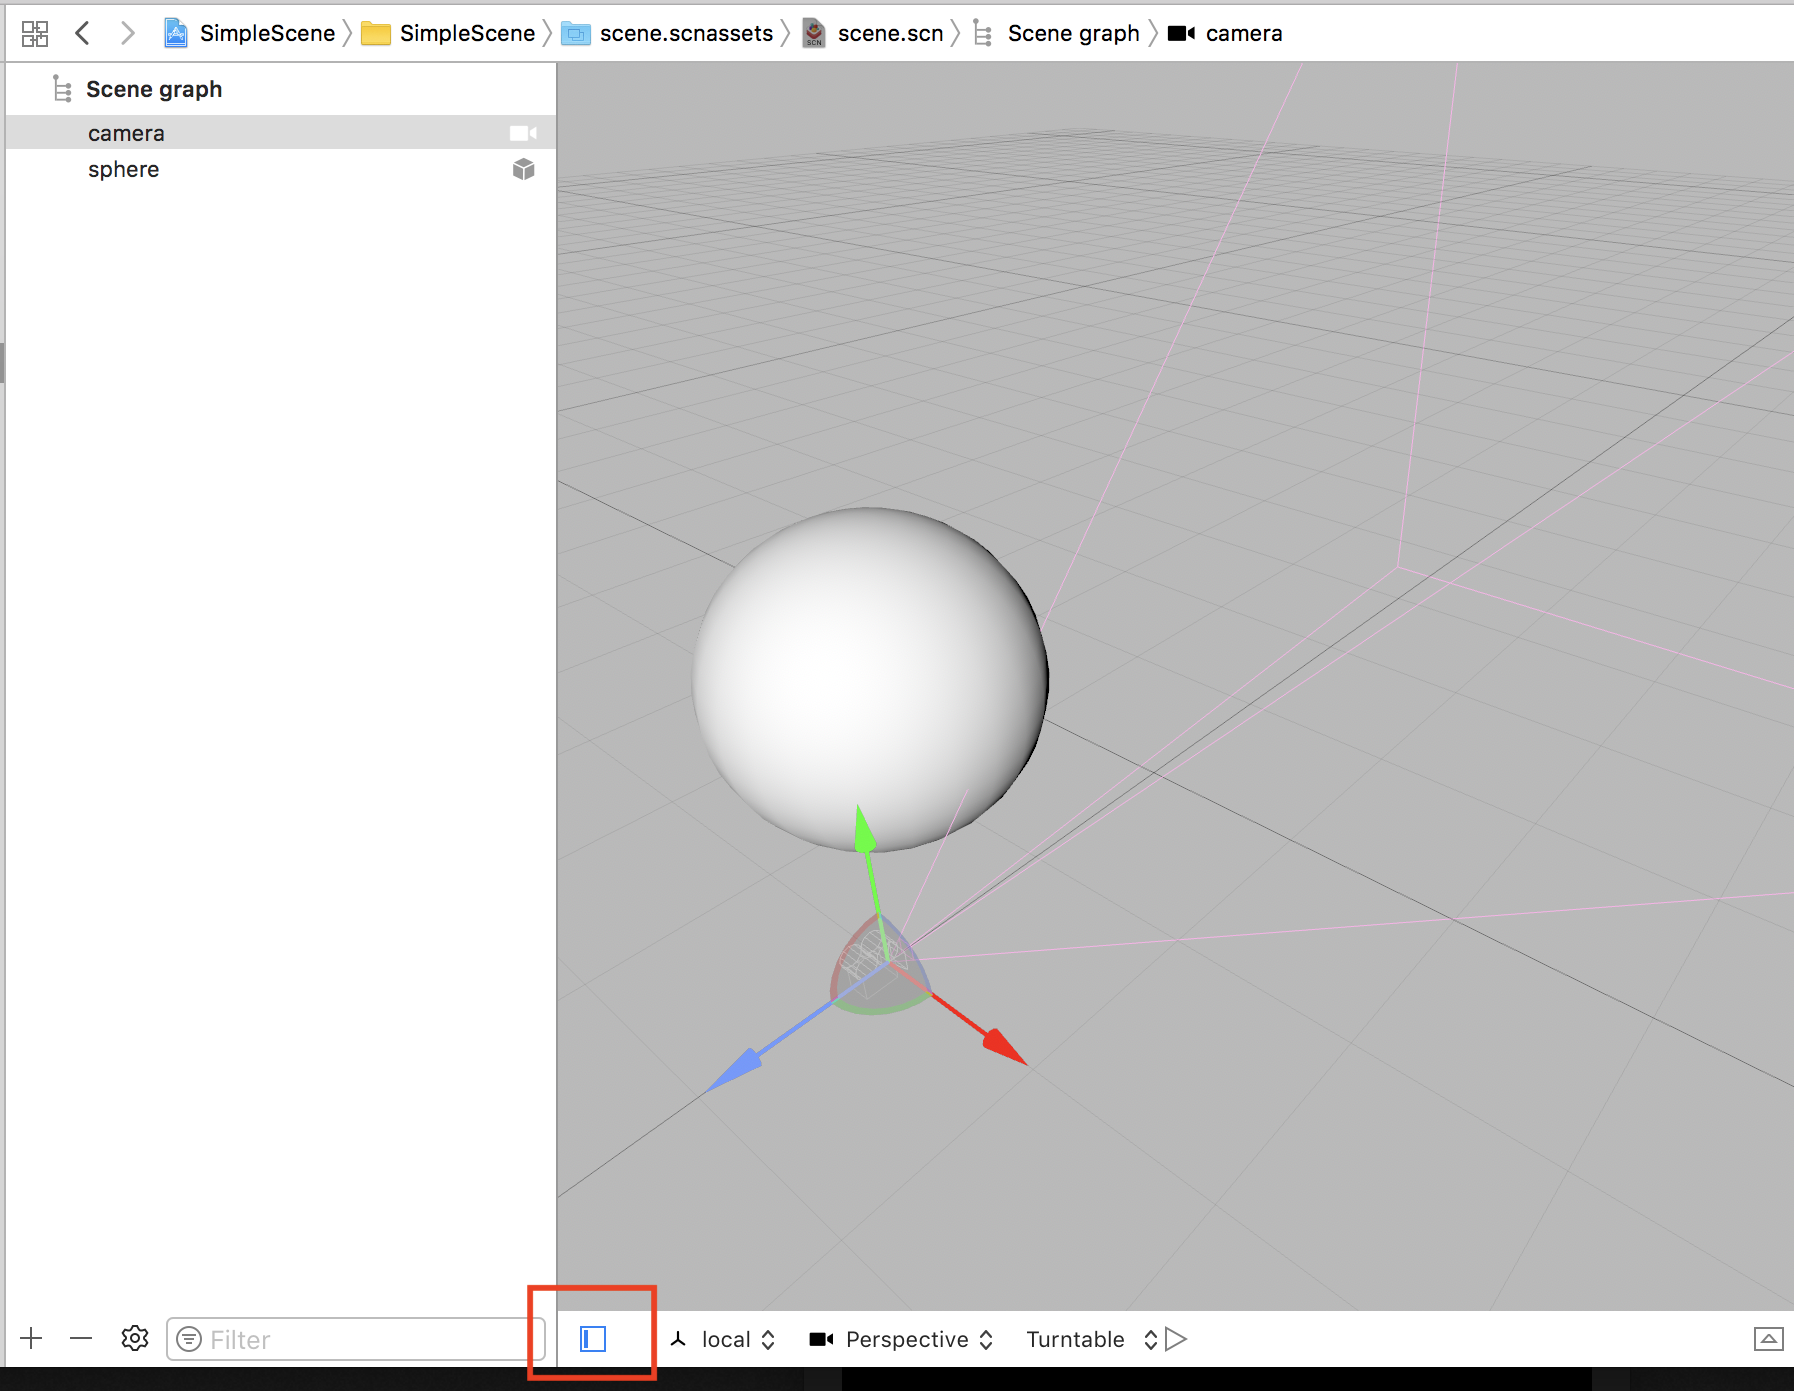
The digital camera is a particular node to offer a standpoint for the person. With out the digital camera, you can’t render the scene at runtime. Once we created the outlet, we set the property allowsCameraControl to true to let the person management the digital camera utilizing pan and drag gestures. When doing so, we’re shifting the digital camera within the 3D area.
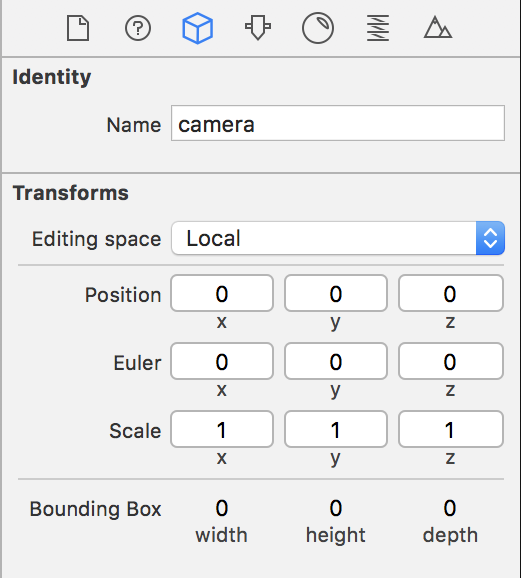
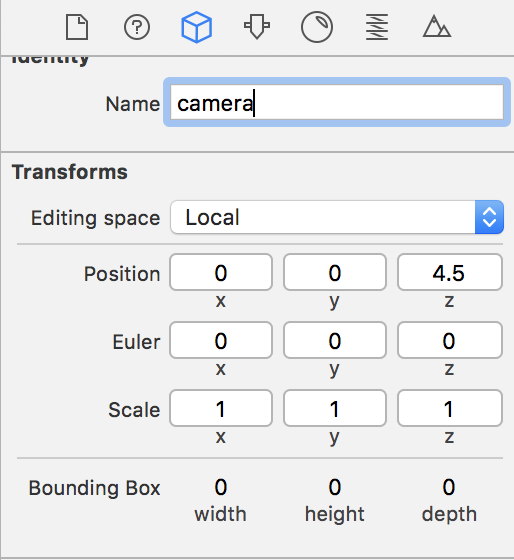
Go to the scene and choose the digital camera node. Then, open the Node Inspector in Xcode (third tab within the Utilities panel). There, set the digital camera Place, Euler and Scale to the next values:
Now, choose the sphere, and set its Place, Euler and Scale to the next values:
Lastly, run the appliance. You need to see the sphere on the display screen.
The digital camera
The digital camera is an important SceneKit node. With out the digital camera we can’t visualize the 3D world. To show a scene, you have to designate a node whose digital camera property comprises a digital camera object because the standpoint. Each SCNNode object has a digital camera property that defines a standpoint—that’s, the place and orientation of the digital camera. The digital camera’s route of view is all the time alongside the unfavorable z-axis of the node’s native coordinate system. To level the digital camera at totally different elements of your scene, use the place, rotation, or rework property of the node containing it.
The digital camera defines a area of the 3D area referred to as frustum. Determine 6 highlights the essential elements of the frustum.
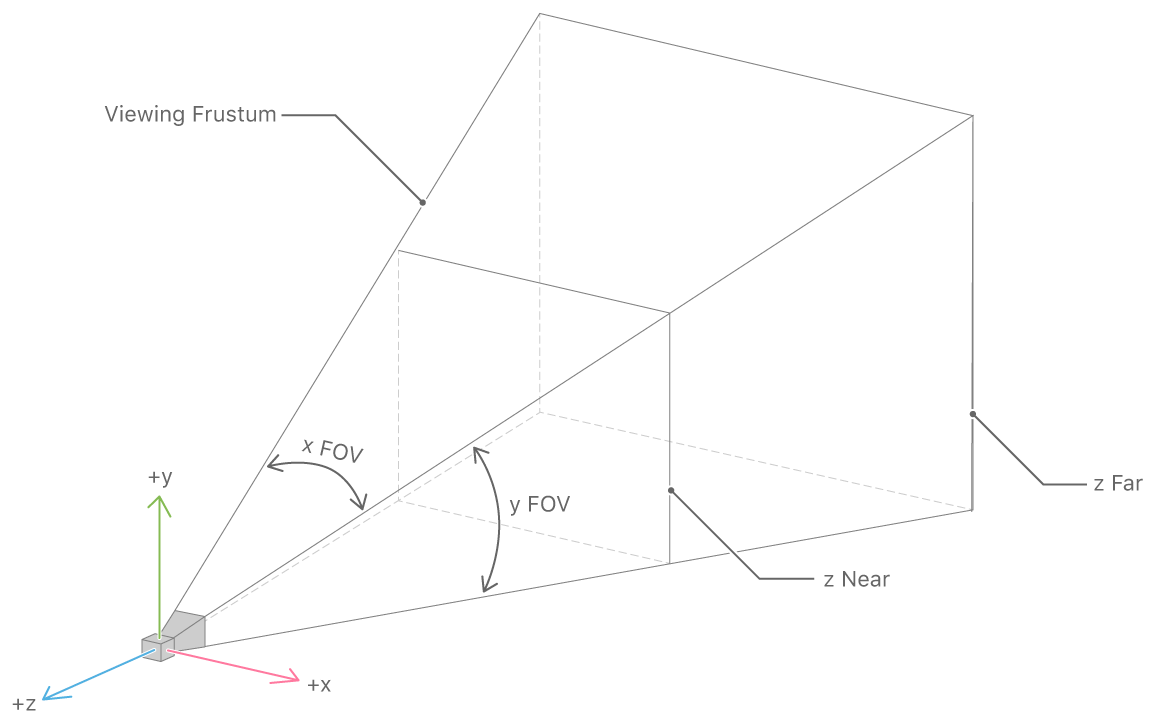
As you’ll be able to see in Determine 6, the digital camera is on the apex of the pyramid. You may set the digital camera area of view utilizing the fieldOfView property. As an alternative, you’ll be able to set the digital camera close to and the far depth limits, utilizing the zNear and zFar properties. Beginning with iOS 10, Apple launched additionally different properties that make your digital camera simulate extra lifelike digital camera options. For instance, you’ll be able to resolve to make use of an Excessive Dynamic Vary (HDR) digital camera and set totally different properties reminiscent of wantsHDR, minimumExposure, maximumExposure, whitePoint and so forth. You may as well regulate the distinction, saturation and shade grading of the digital camera (distinction, saturation, colorGrading). In iOS 11, Apple added extra properties reminiscent of focalLenght, focusDistance, sensorHeight, fStop, and extra.
Geometry
I wish to spotlight that the sphere node we used within the earlier instance is a node with a particular form. Certainly, an SCNNode doesn’t have any particular form. As an alternative, you must set the geometry property of a node to the particular form you need. SceneKit offers built-in shapes:
- Flooring (
SCNFloor) - Field (
SCNBox) - Capsule (
SCNCapule) - Cone (
SCNCone) - Cylinder (
SCNCylinder) - Airplane (
SCNPlane) - Pyramid (
SCNPyramid) - Sphere (
SCNSphere) - Torus (
SCNTorus) - Tube (
SCNTube) - Textual content (
SCNText) - Form (
SCNShape).
All these built-in shapes are subclasses of SCNGeometry.
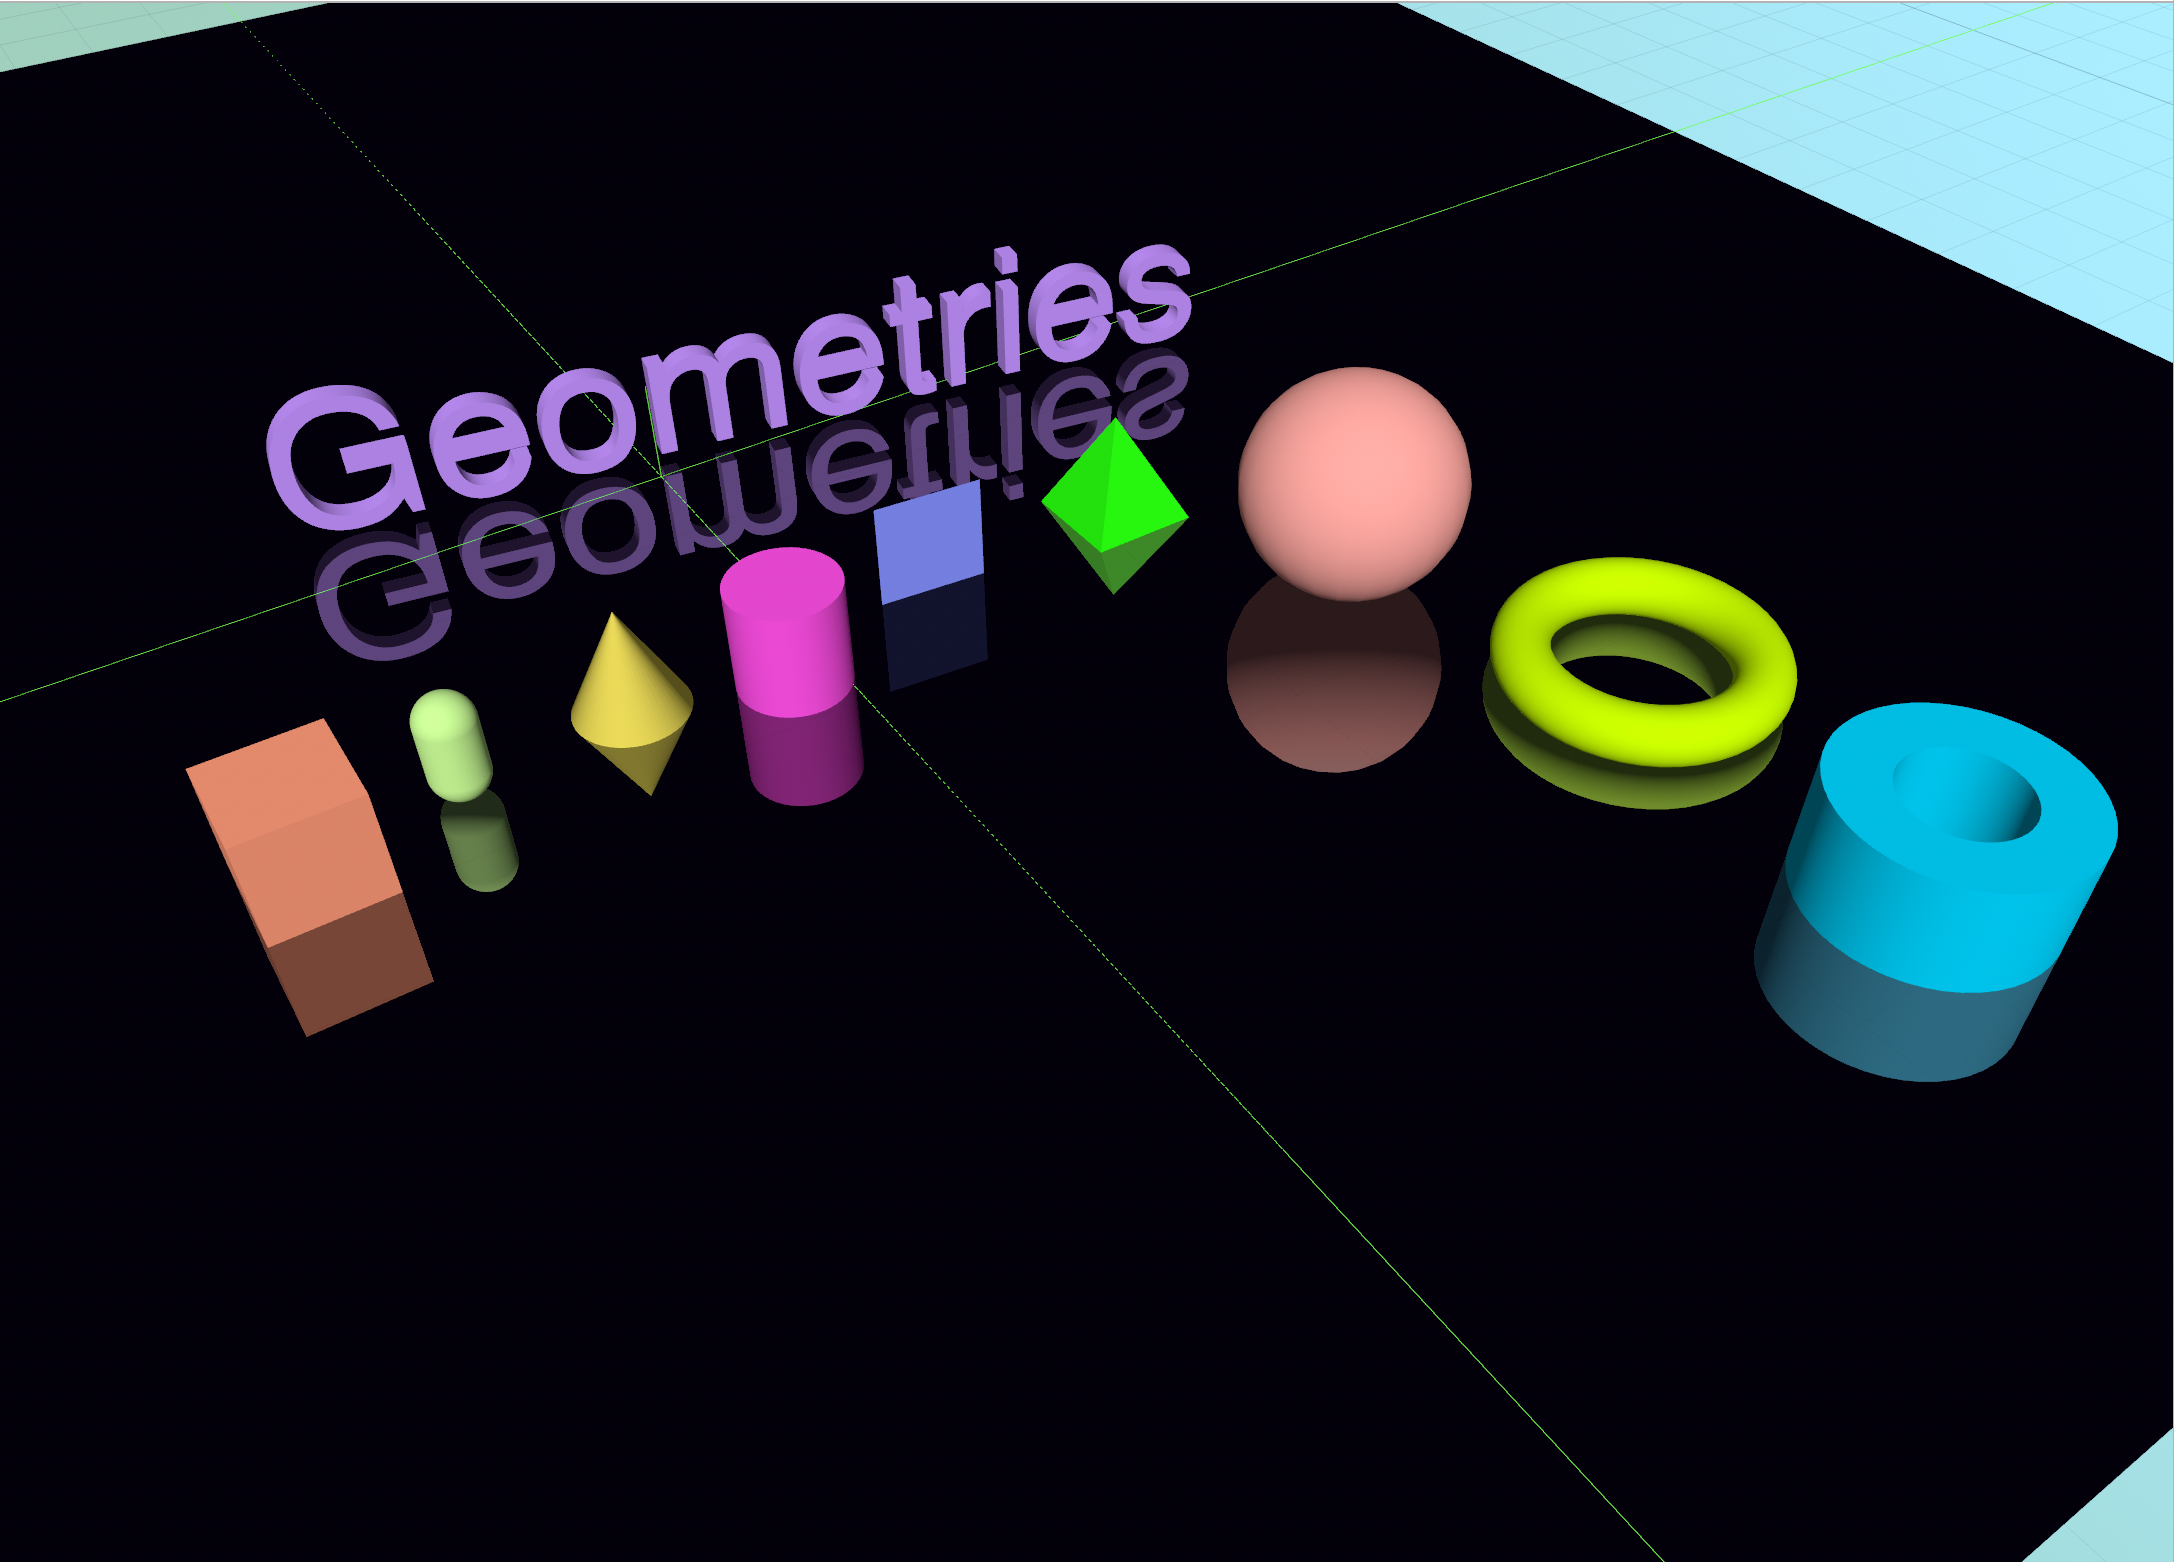
Let’s give a have a look at these geometries. The next image highlights all of the shapes accessible in SceneKit.
SCNFloor
A flooring extends within the x- and z-axis dimensions of its native coordinate area, and is situated within the airplane whose y-coordinate is zero. You may set size and width for a flooring, utilizing the size and width properties. Different properties, reminiscent of reflectivity, reflectionFalloffStart, reflectionFalloffEnd, and reflectionResolutionScaleFactor, are used to manage the reflectivity of the ground.
SceneKit creates a mirrored image impact by rendering the scene twice. First, it renders the scene into an offscreen buffer, utilizing a standpoint whose place is the reflection of the digital camera’s place. Subsequent, it renders the scene from the digital camera’s standpoint, utilizing the offscreen buffer as a texture map for the ground’s floor. Rendering the scene twice incurs a efficiency value. Lowering the decision of the offscreen buffer reduces this value however causes the mirrored picture to seem blurry.
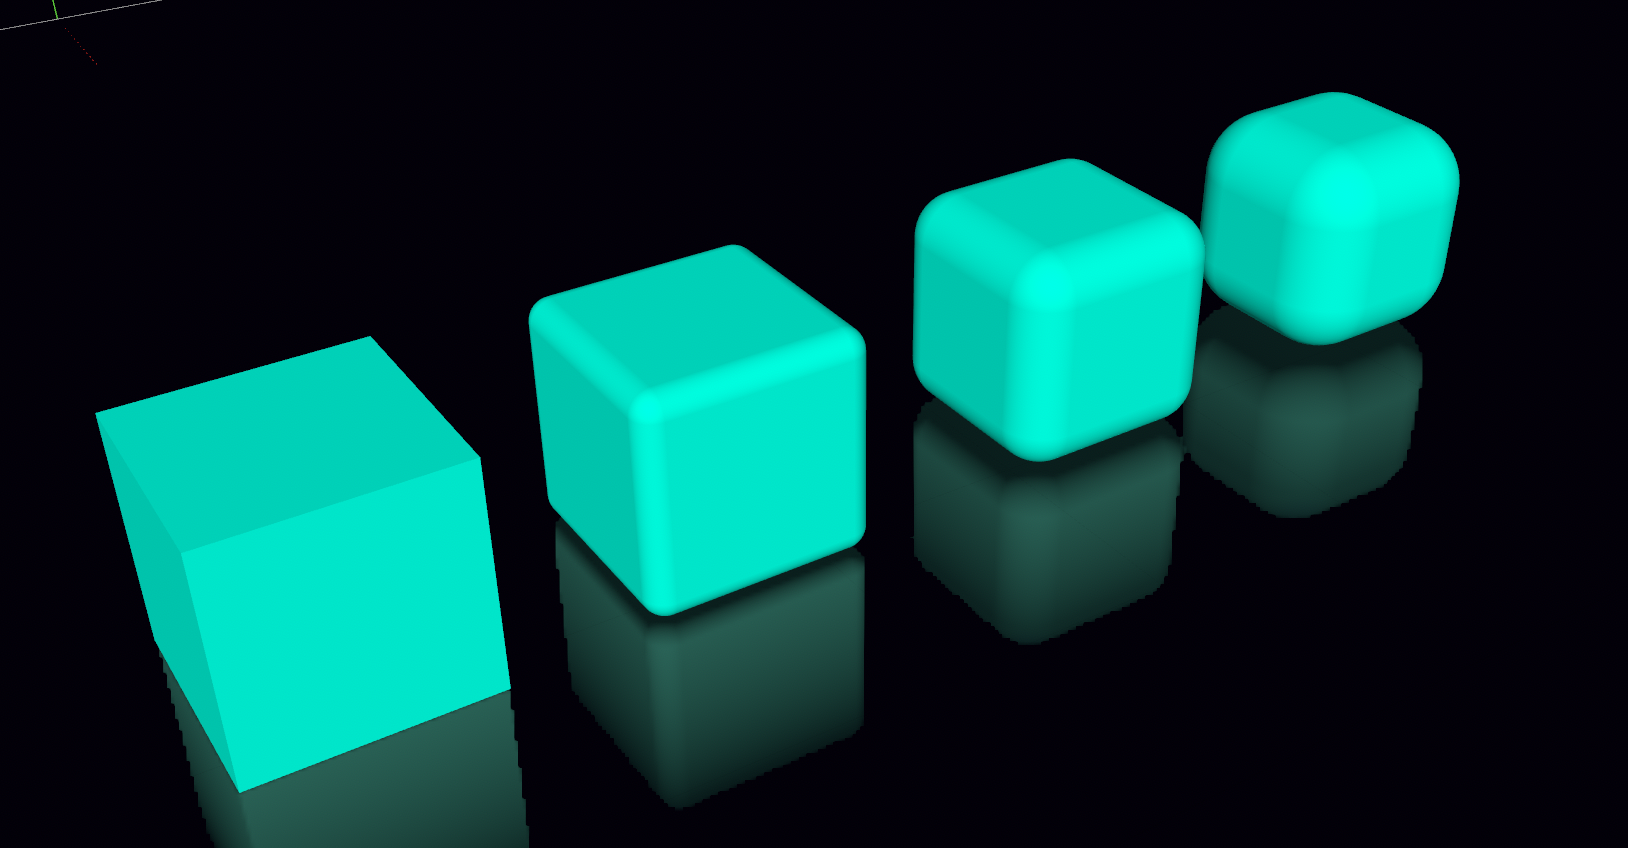
SCNBox
A SCNBox geometry defines the form of the field within the x-, y-, and z-axis dimensions of its native coordinate area by setting its width, peak, and size properties. If you wish to add rounded edges and corners to a field, you should use the chamferRadius property. To place and orient a field in a scene, connect it to the geometry property of an SCNNode object.
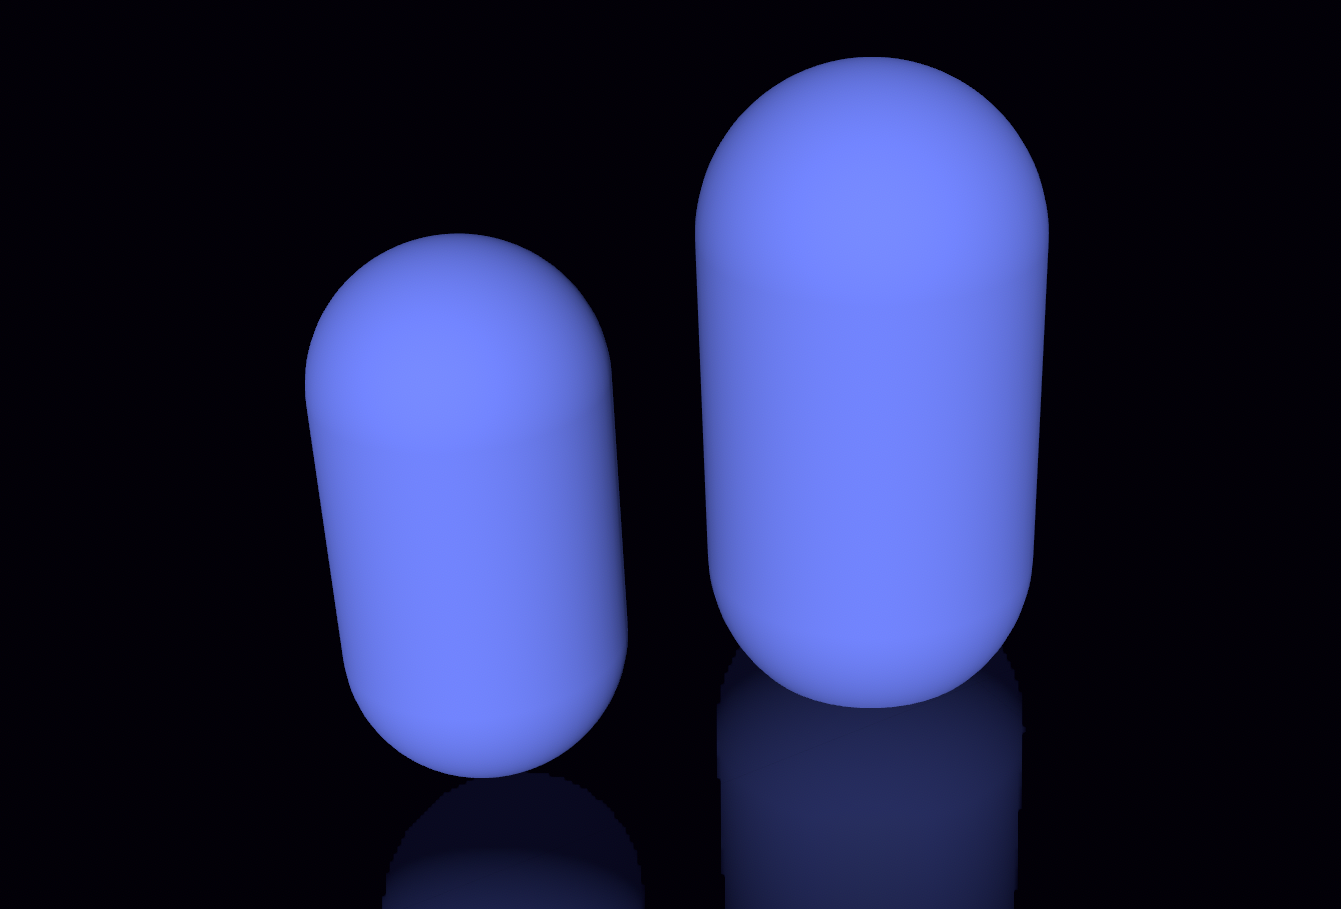
SCNCapsule
A SCNCapsule geometry defines the scale of the 2 hemispheres forming the ends of a capsule with the capRadius property. As a result of the cylindrical physique of the capsule stretches between its two hemispherical ends, its round cross part within the x- and z-axis dimensions has the identical radius. You may outline the capsule’s extent within the z-axis dimension of its native coordinate area with the peak property. To vary the orientation of a capsule, you merely regulate the rework property of the node containing the capsule geometry.
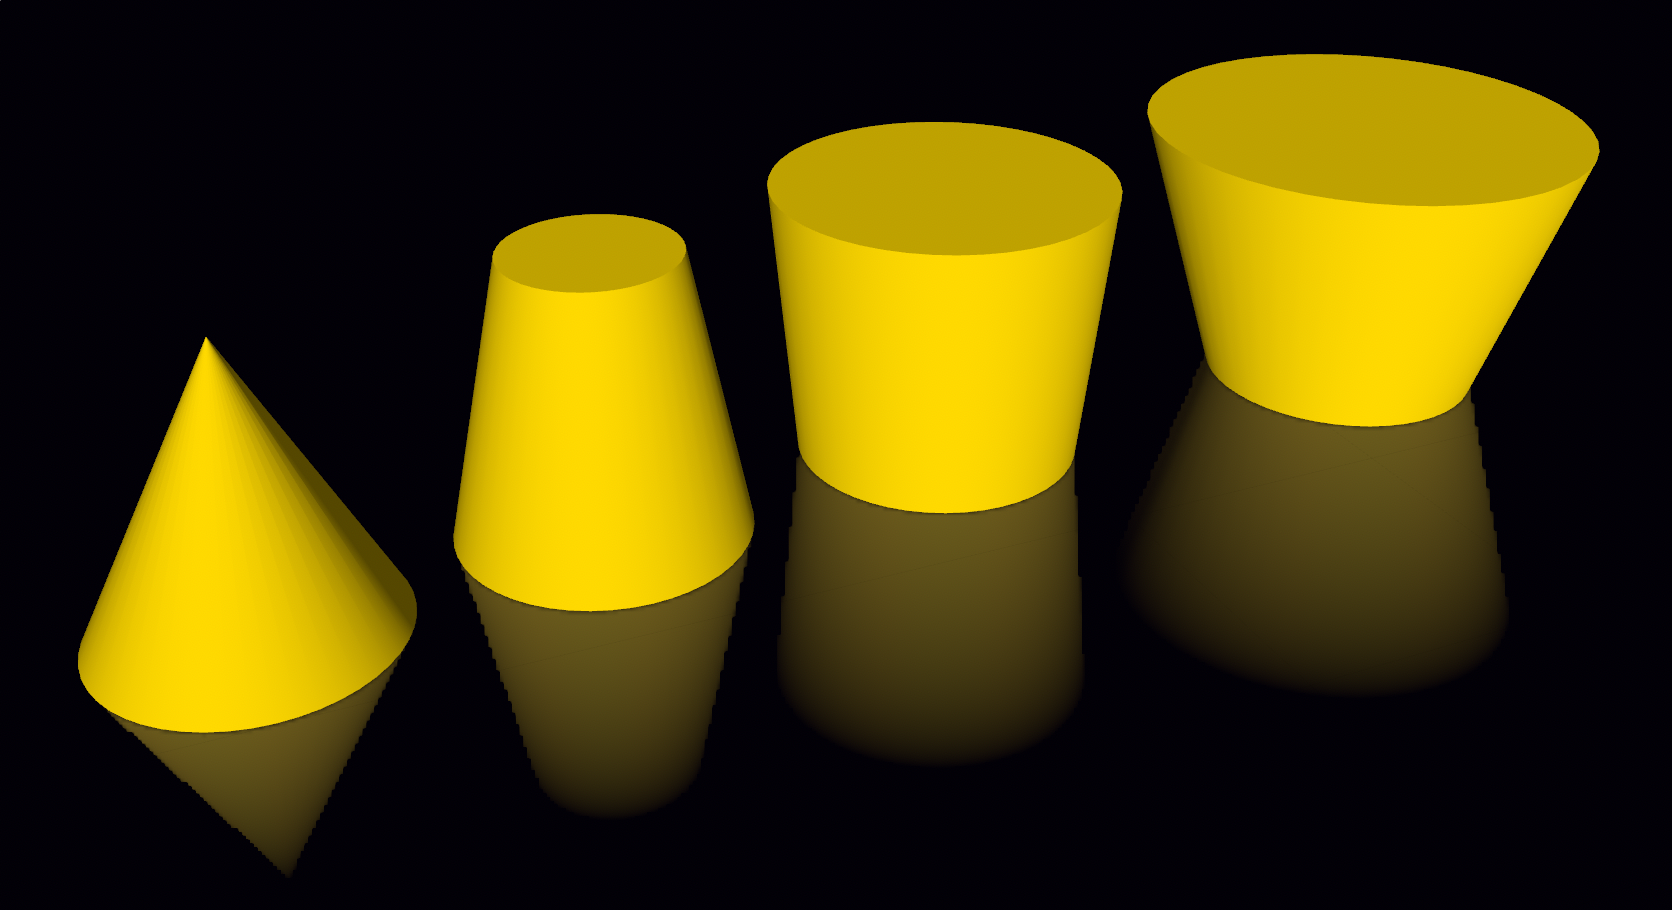
SCNCone
A cone defines the floor of a strong whose base is a circle and whose facet floor tapers to some extent centered above its base. You outline the scale of the cone’s base within the x- and z-axis dimensions of its native coordinate area with its bottomRadius property, and its extent within the y-axis dimension with its peak property. You may create a cone that tapers to some extent by setting its topRadius property to zero. The next determine highlights cones with totally different topRadius values.
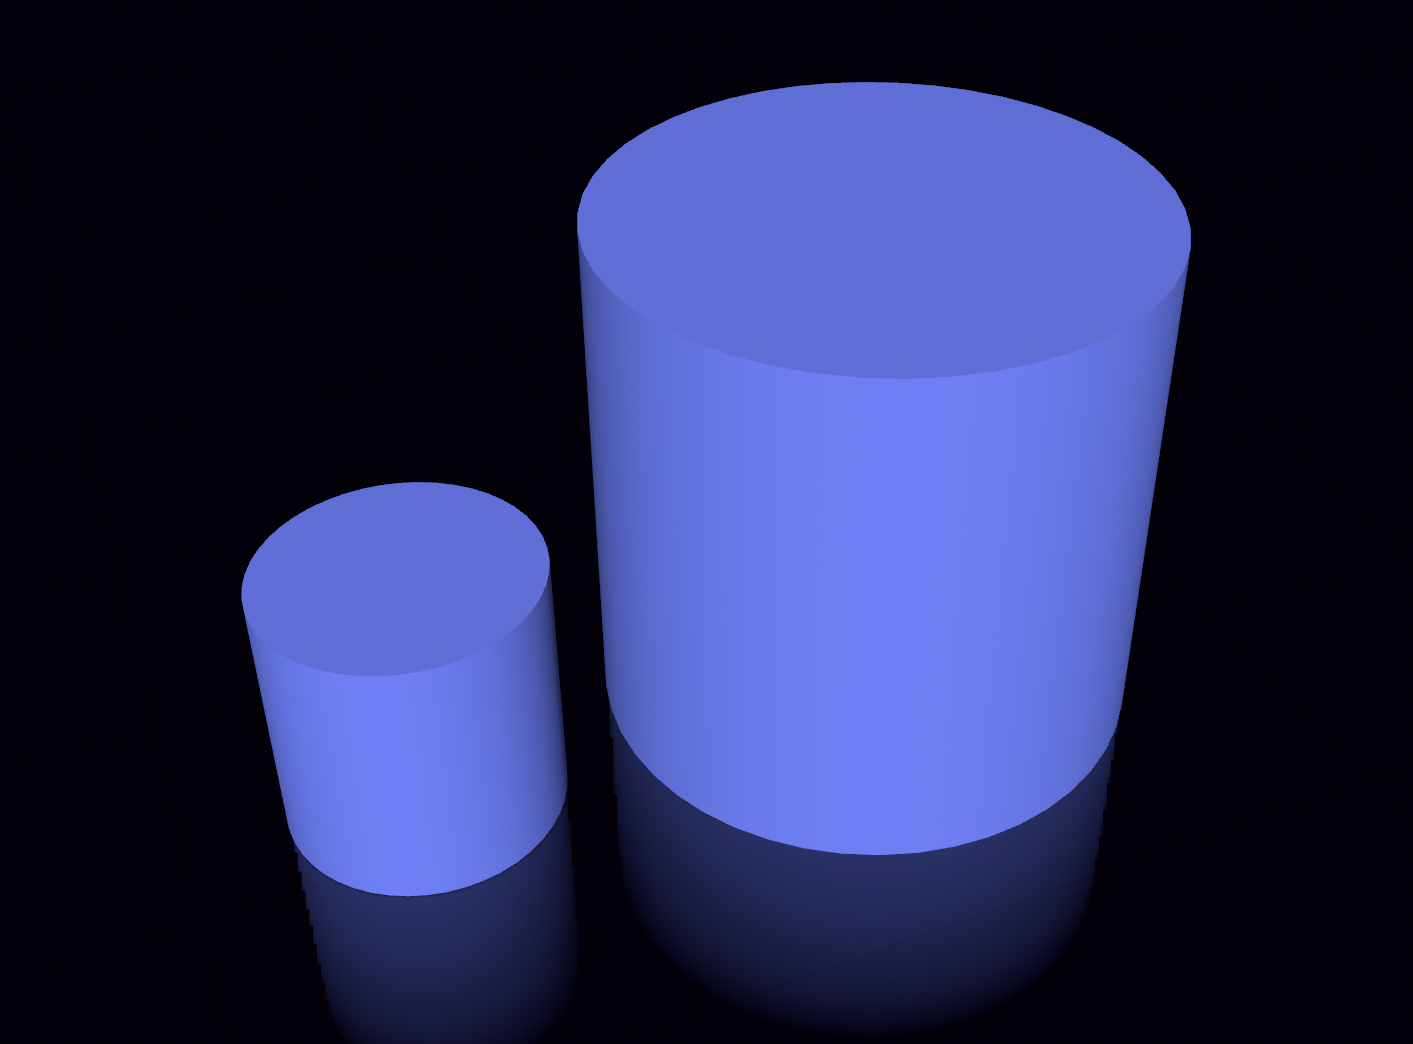
SCNCylinder
A cylinder defines the floor of a strong whose each cross part alongside a linear axis is a circle of equal dimension. You may outline the scale of the cylinder’s cross part within the x- and z-axis dimensions of its native coordinate area with the radius property, and its extent within the y-axis dimension with the peak property.
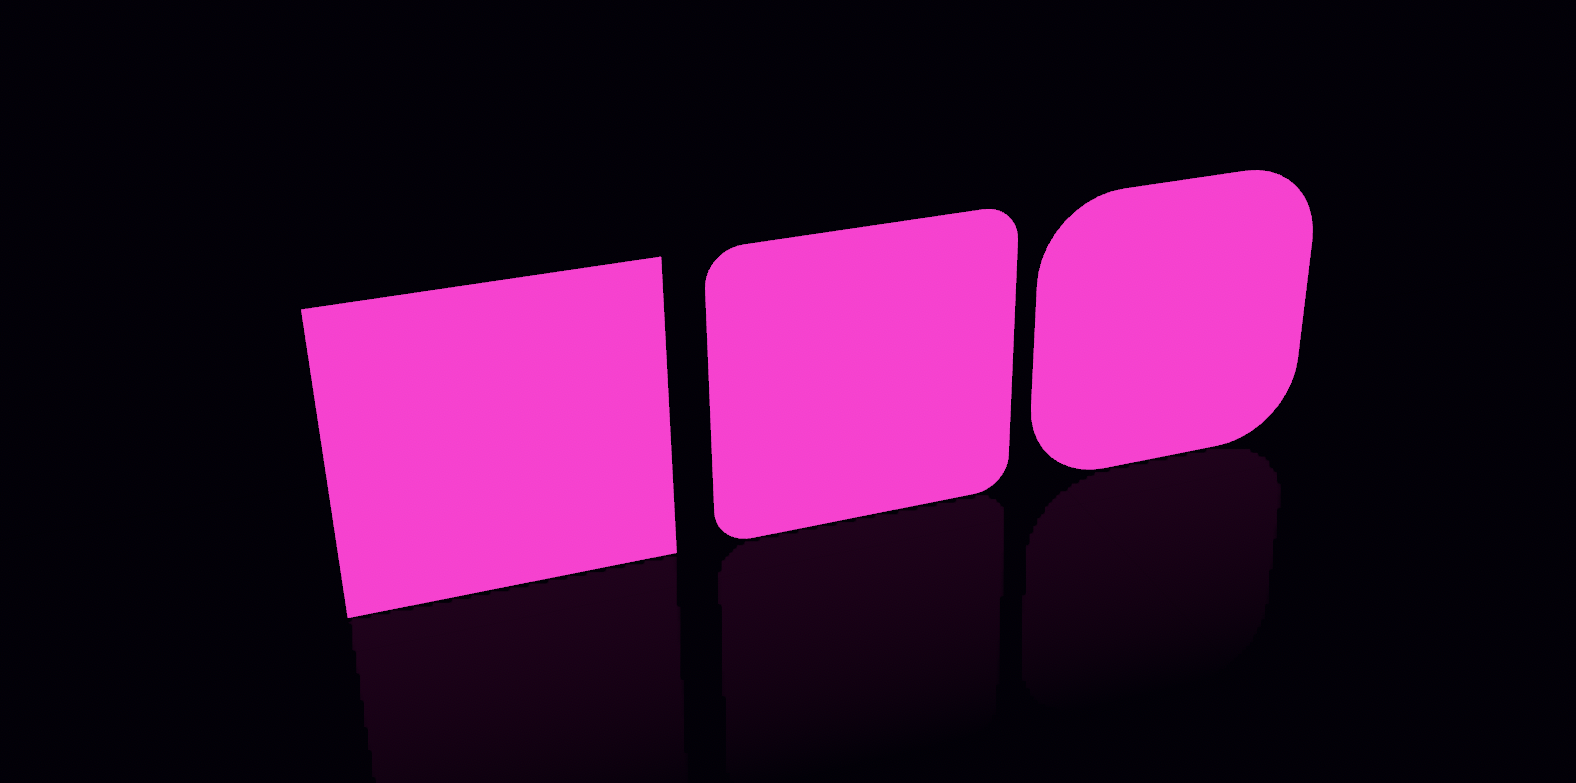
SCNPlane
A airplane defines a flat floor within the x- and y-axis dimensions of its native coordinate area in response to its width and peak properties. To orient a airplane otherwise, regulate the rework property of the node containing the airplane geometry. You may create a rounded rectangular airplane utilizing the cornerRadius property.
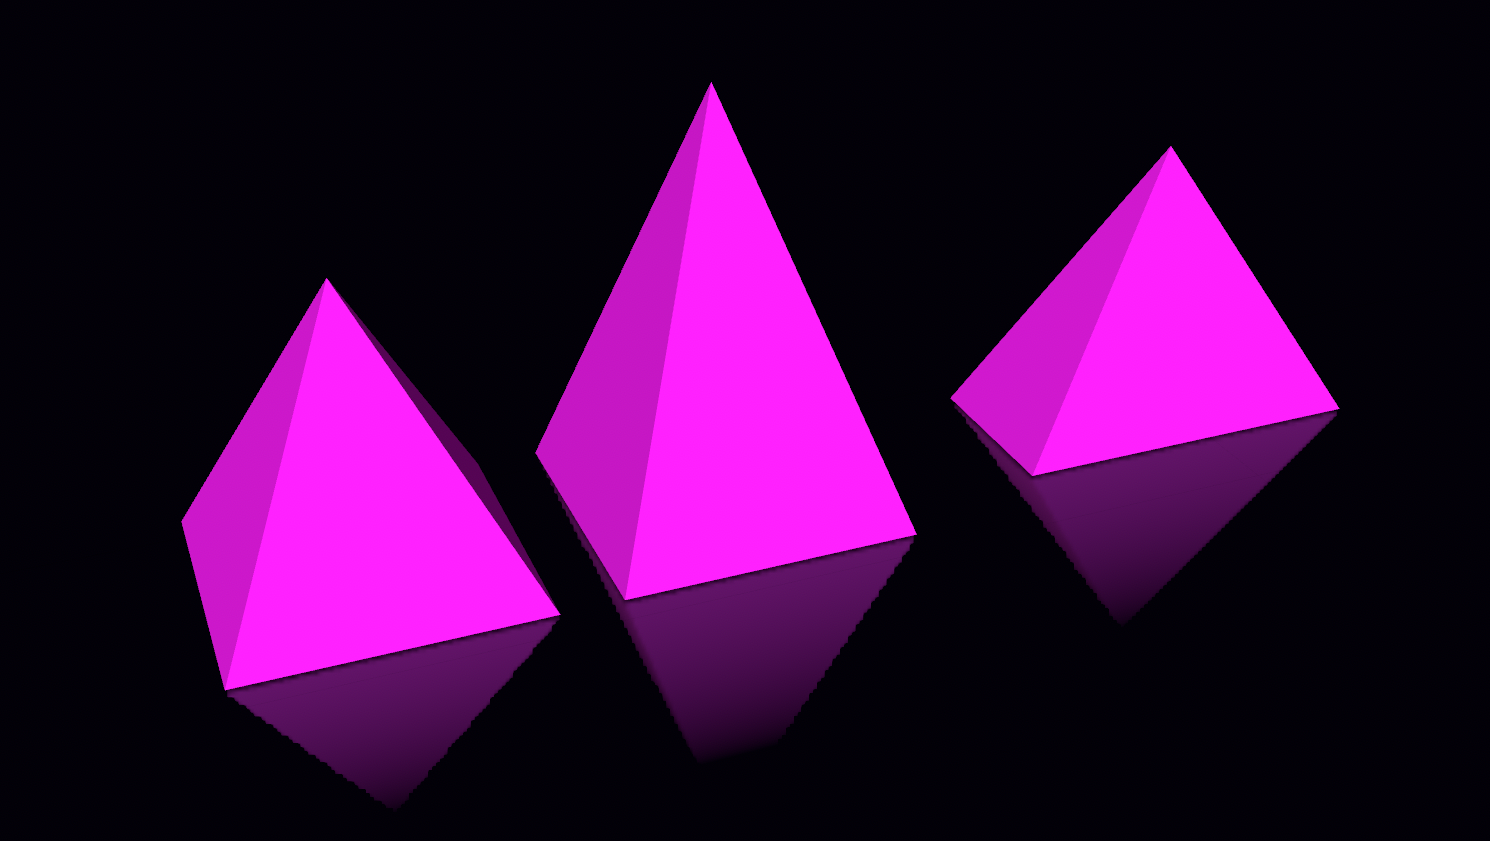
SCNPyramid
A pyramid defines the floor of a strong whose base is a rectangle, and whose 4 triangular facet faces converge at a degree centered above its base. You outline the form of the pyramid’s base within the x- and z-axis dimensions of its native coordinate area with the width and size properties, and its extent within the y-axis dimension with the peak property.
SCNSphere
A sphere defines a floor whose each level is equidistant from its heart, which is positioned on the origin of its native coordinate area. You outline the scale of the sphere in all three dimensions utilizing its radius property.
In the event you set the sphere’s isGeodesic property to true, SceneKit constructs the sphere by successively subdividing the triangular surfaces of an everyday icosahedron.
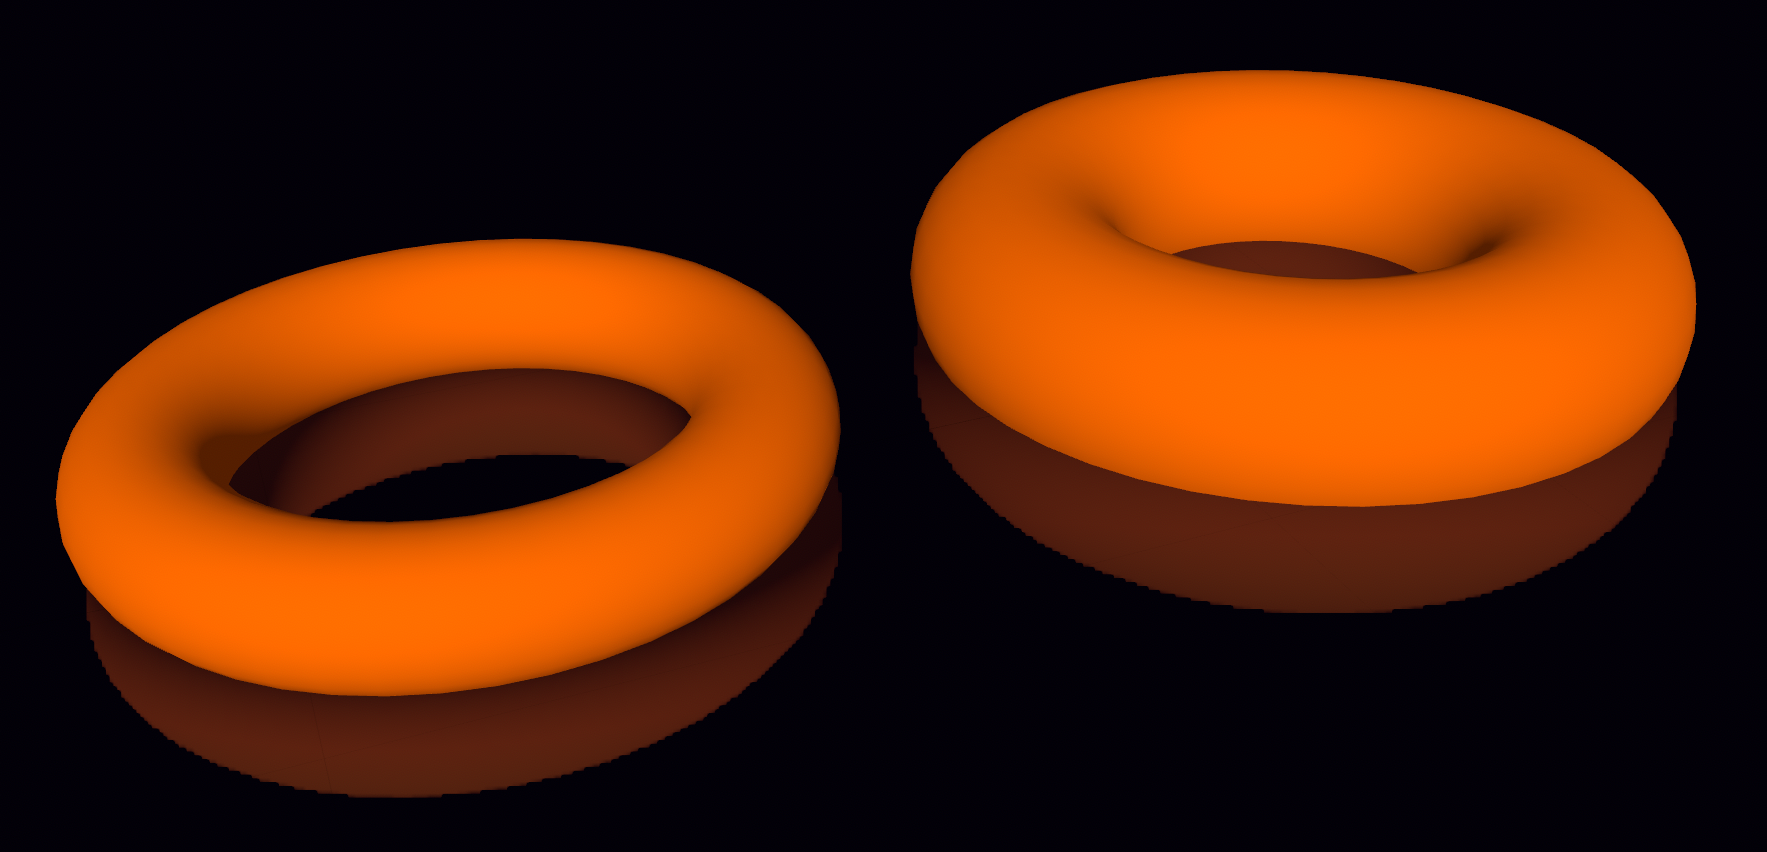
SCNTorus
A torus is mathematically outlined as a floor of revolution fashioned by revolving a circle round a coplanar axis. It’s the product of two circles: a big ring and a pipe that encircles the ring. SceneKit makes use of these phrases to outline the size of a torus geometry in its native coordinate area. The torus’ ringRadius property defines a circle within the x- and z-axis dimensions, centered on the origin, and its pipeRadius property defines the width of the floor encircling the ring.
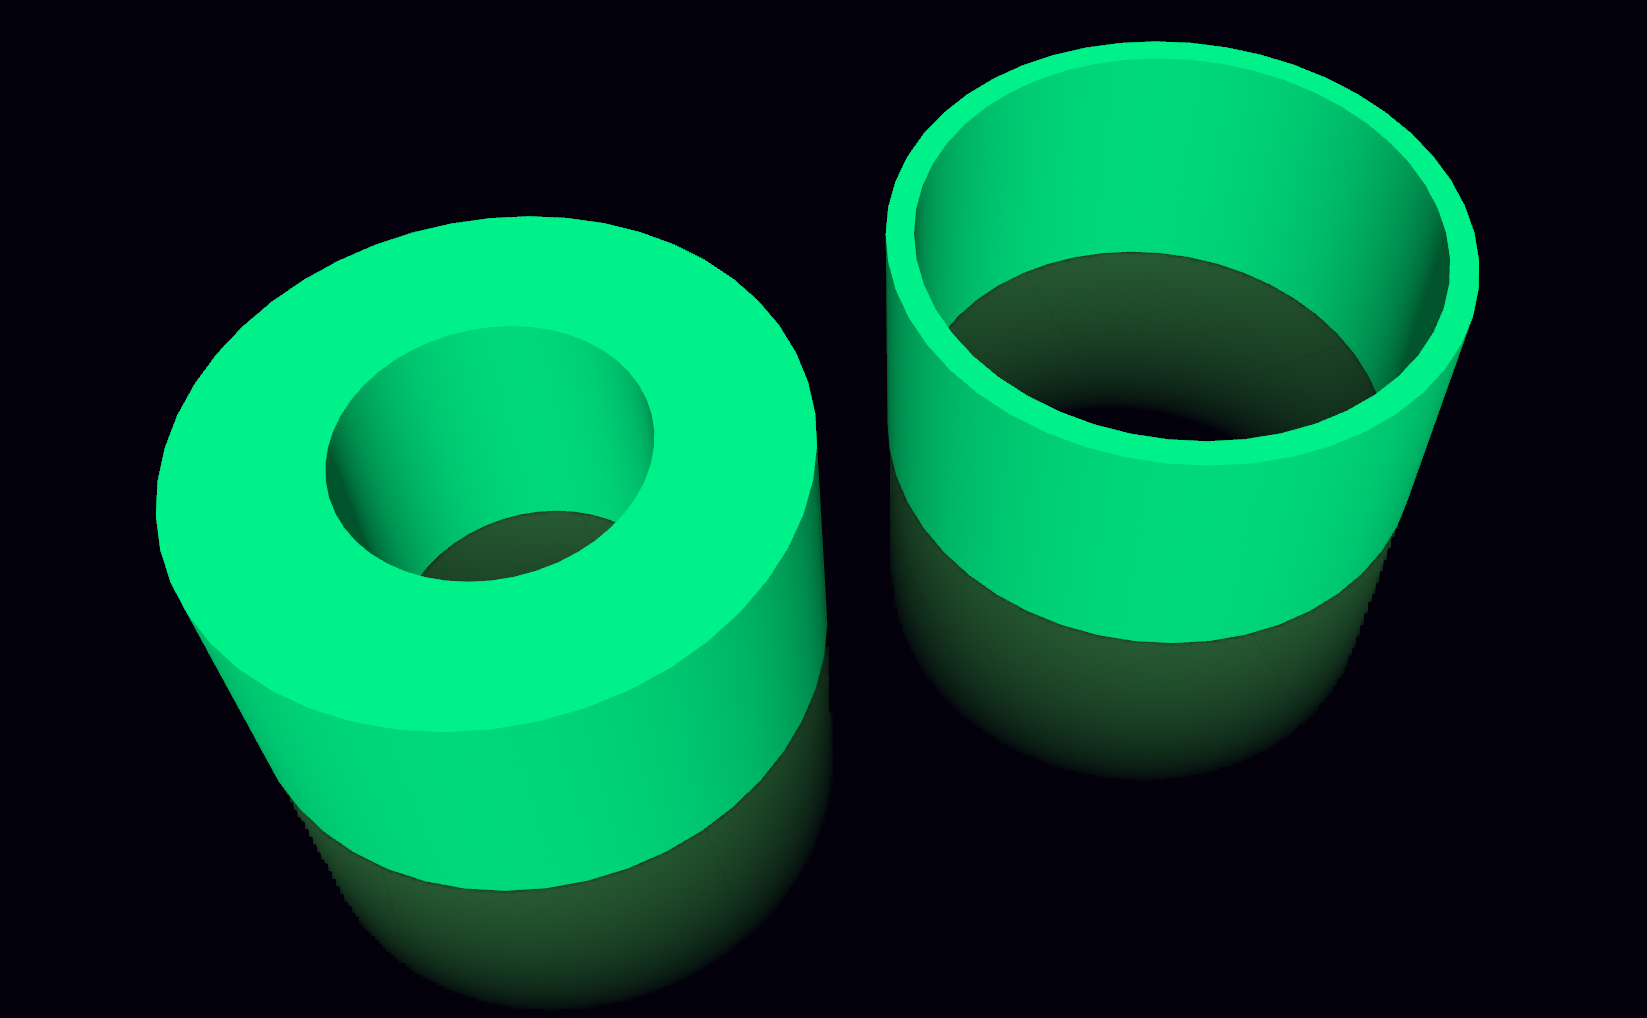
SCNTube
The outer floor of a tube is a cylinder. Outline the scale of the cylinder’s cross part within the x- and z-axis dimensions of its native coordinate area with the outerRadius property, and its extent within the y-axis dimension with the peak property.
SCNText
You present textual content for the geometry utilizing an NSString or NSAttributedString object. Within the former case, the properties of the SCNText object decide the type and formatting of the whole physique of textual content. While you create a textual content geometry from an attributed string, SceneKit types the textual content in response to the attributes within the string, and the properties of the SCNText object decide the default type for parts of the string that haven’t any type attributes. SceneKit can create textual content geometry utilizing any font and elegance supported by the Core Textual content framework, excluding bitmap fonts (reminiscent of those who outline shade emoji characters).
Within the native coordinate system of the textual content geometry, the origin corresponds to the decrease left nook of the textual content, with the textual content extending within the x- and y-axis dimensions. The geometry is centered alongside its z-axis.

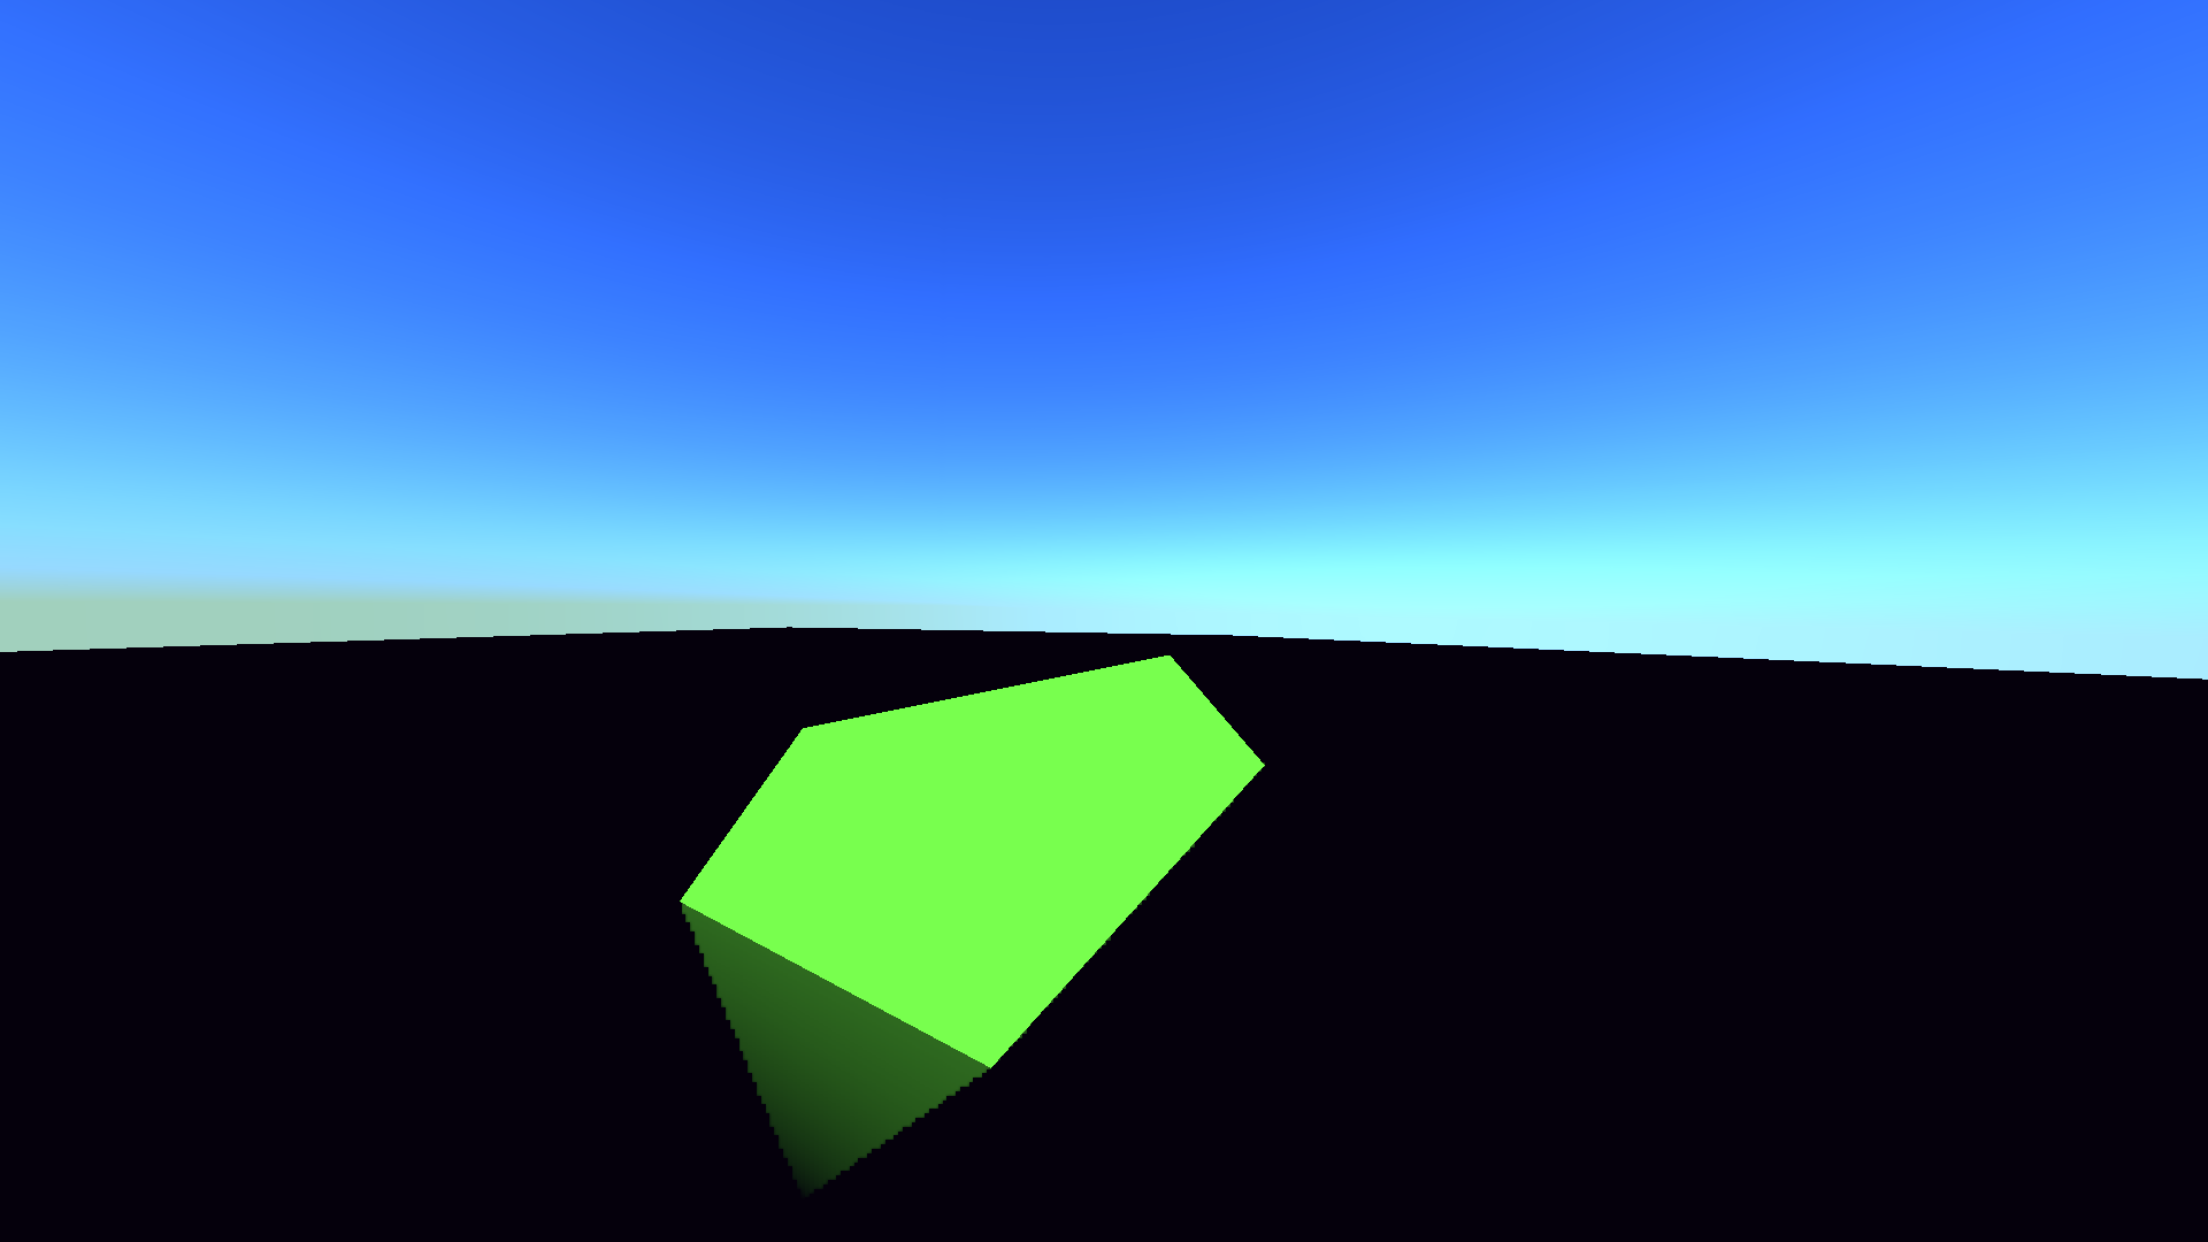
SCNShape
SceneKit can create a 3D geometry by extruding a Bézier path, which extends within the x- and y-axis instructions of its native coordinate area, alongside the z-axis by a specified quantity.
This geometry just isn’t accessible within the SceneKit editor. So, you’ll be able to solely construct it programatically. You create this geometry utilizing the init(path:extrusionDepth:) technique, passing a Bezier path and the quantity of extrusion. After that, you’ll be able to chamfer the ensuing 3D form in several approach utilizing the chamferMode, chamferProfile and chamferRadius properties.
Conclusions
On this publish, we have a look at a number of the predominant courses in SceneKit. We simply touched the floor of this framework that provides an enormous set of functionalities. We are going to cowl extra about this framework in subsequent posts. So, keep tuned.
Geppy
Geppy Parziale (@geppyp) is cofounder of InvasiveCode. He has developed many iOS purposes and taught iOS improvement to many engineers around the globe since 2008. He labored at Apple as iOS and OS X Engineer within the Core Recognition staff. He has developed a number of iOS and OS X apps and frameworks for Apple, and lots of of his improvement initiatives are top-grossing iOS apps which might be featured within the App Retailer. Geppy is an knowledgeable in laptop imaginative and prescient and machine studying.


(Visited 13,207 instances, 1 visits immediately)
[ad_2]
Source_link